Creating an inviting atmosphere within your living area revolves around thoughtful selections that convey comfort without sacrificing elegance. From the understated nuances to the bold statements, there exists a multitude of options designed to enhance the aesthetics of your surroundings. The aim is to transform the ordinary into something that resonates with leisure and sophistication.
As we delve into the realm of interior enhancements, focus shifts towards elements that effortlessly complement a refined lifestyle. Subtle accents and innovative designs can dramatically influence the overall feel of a setting, ensuring that each detail contributes to an overarching theme of tranquility and warmth. The possibilities are endless, inviting personal touches that celebrate both relaxation and style.
In this exploration, we will uncover various approaches to elevate your decor, merging function and flair seamlessly. By selecting pieces that reflect your personality while prioritizing comfort, you’ll cultivate an environment that feels not just like a space, but a true sanctuary tailored to your rhythms. Embrace your creative spirit and discover how small changes can lead to significant transformations.
Creative Window Treatments for Minimalists
In the realm of interior design, simplicity often reigns supreme, especially for those who appreciate a clean and uncluttered aesthetic. Finding alternatives that resonate with minimalistic principles can transform ordinary views into serene escapes. The focus should remain on fostering a tranquil atmosphere while enhancing the natural light that streams in.
Sheer Fabrics: Light, airy materials create an illusion of openness. These delicate textures gently diffuse sunlight, creating a warm ambiance without overwhelming the space. They provide just enough coverage to maintain privacy while still celebrating the view outside.
Roller Shades: Functional and unobtrusive, these coverings are ideal for those seeking straightforward solutions. Available in various colors and patterns, they can blend seamlessly with any environment. The minimalist approach is further accentuated by their clean lines and ease of use.
Natural Wood Blinds: Utilizing sustainable materials adds an earthy touch to any area. The natural hues of wood can complement a variety of design schemes while offering adjustable light control. Minimalists will appreciate the balance of style and ecological consciousness.
Incorporating these innovative treatments can elevate spaces, ensuring that every element serves a purpose, contributing to a harmonious and peaceful setting.
Incorporating Colorful Accents in Decor
Infusing vibrant tones into interior spaces can bring life and energy to any environment. By strategically placing vivid elements, one can create an inviting atmosphere that enhances overall aesthetic appeal. Color plays a crucial role in setting the mood, and understanding how to use it effectively can transform a mundane area into a captivating visual experience.
-
Textiles: Cushions, throws, and rugs in bold hues can instantly uplift a room’s ambiance. Choose complementary shades to enhance existing decor.
-
Artwork: Eye-catching pieces can serve as focal points. Look for prints and paintings that incorporate a spectrum of colors to create interest.
-
Accessories: Decorative items such as vases, candles, or sculptures can add splashes of color without overwhelming the space.
-
Accent Walls: Consider painting one wall in a striking tone to create a dramatic focal point that draws attention.
Remember that balance is key. Too many vibrant elements can lead to visual chaos, while the right combination fosters harmony and sophistication. Experimenting with color accents can unveil new potential within your space, making it a true reflection of your personality.
Transformative Furniture Arrangements for Spaces
Reimagining the layout of a room can significantly alter its character and function. By thoughtfully arranging elements within a space, one can create an environment that feels fresh and invigorating. The goal is to enhance not only aesthetic appeal but also comfort and practicality, ultimately reshaping how one interacts with the area.
Creating Zones for Better Flow
Dividing a larger room into distinct areas serves to improve flow and usability. Utilizing multi-functional pieces allows for a seamless transition between different activities. For instance, a versatile seating arrangement can foster relaxation while doubling as a gathering spot for social events. This method encourages a cohesive experience, allowing inhabitants to enjoy varied atmospheres within a single setting.
Emphasizing the Centerpiece
Every room contains an element that can act as a focal point, be it a striking piece or a unique feature. Positioning surrounding elements to draw attention to this centerpiece can create a harmonious balance. Arrange seating around it or use accessories to guide the eye, ensuring a unified and appealing composition that invites engagement.
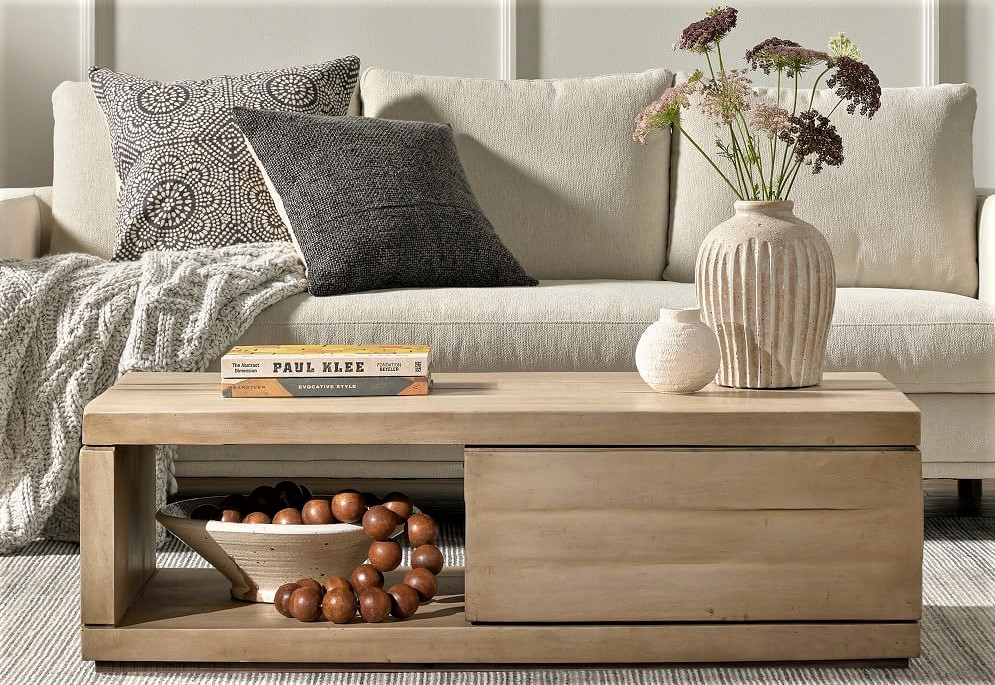
Functional Accessories for Effortless Style
Enhancing the appeal of a space doesn’t always require extensive renovations. By incorporating practical elements, one can easily elevate the aesthetic without extensive effort. The right components can make a significant difference, combining utility and visual charm.
Key Elements to Enhance Your Space
Certain accessories can beautifully complement any setting, injecting personality while serving clear purposes. From elegant storage solutions to subtle decorative pieces, these elements blend seamlessly into your environment.
|
Accessory Type |
Functionality |
Aesthetic Benefit |
|---|---|---|
|
Smart Shelving |
Organization and display |
Creates visual interest and maximizes space |
|
Decorative Baskets |
Storage |
Adds texture and warmth |
|
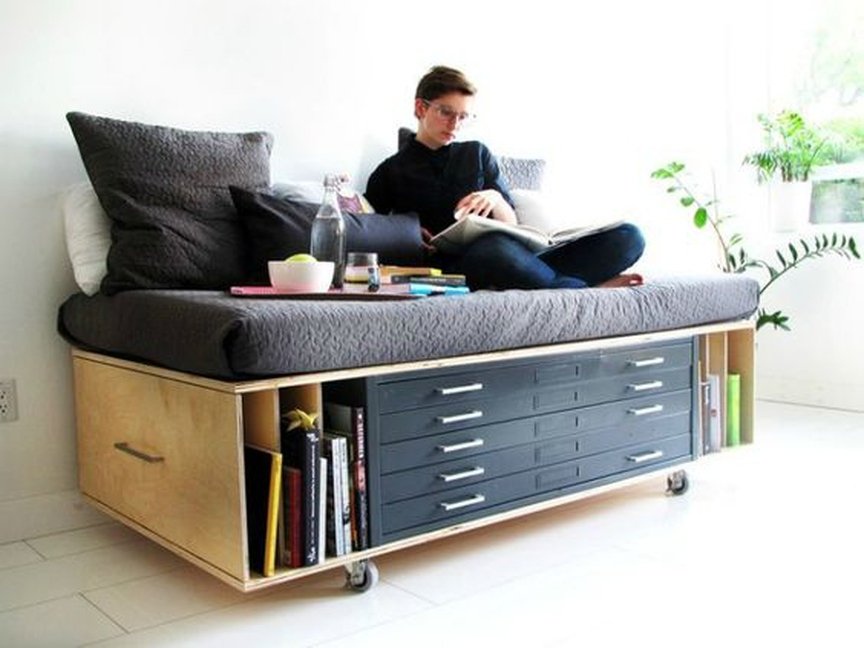
Multi-functional Ottomans |
Seating and storage |
Stylish and versatile seating option |
|
Accent Pillows |
Comfort and support |
Colorful touch to enhance style |
Combining Function with Beauty
Selecting pieces that not only look appealing but also serve essential roles can transform any area. This method ensures that every element in your space contributes to both form and function, making your environment more enjoyable and inviting.
Embracing Natural Elements in Design
Incorporating organic components into interior arrangements fosters a seamless connection between the indoor environment and the surrounding landscape. This approach creates a tranquil atmosphere, inviting individuals to experience the soothing presence of nature within their living spaces. By blending various textures, colors, and patterns inspired by the natural world, one can achieve a harmonious balance that enhances comfort and well-being.
Utilizing materials such as wood, stone, and natural fibers adds depth and warmth to various settings. These elements not only impart aesthetic appeal but also contribute to a sense of authenticity and sustainability. Moreover, incorporating greenery through plants or nature-themed artwork infuses vitality and freshness, transforming any area into a serene sanctuary.
Choosing a color palette that draws from earthy tones can further enhance the overall ambiance. Shades of green, brown, and beige evoke a sense of calm and stability, making spaces feel more inviting. Carefully selected decorative items that reflect organic shapes and patterns can bring an element of dynamism while still honoring nature’s inherent beauty.
Ultimately, embracing elements from the natural world leads to thoughtfully curated spaces that inspire relaxation and connection, enriching the overall living experience and promoting a sense of peace and balance.
Maximizing Light with Stylish Solutions
Enhancing the brightness within a space can dramatically alter its atmosphere, creating a more inviting and airy environment. By incorporating clever design elements, one can effortlessly allow more natural illumination to permeate throughout. This section explores innovative approaches that not only serve a practical purpose but also elevate the aesthetic of a room.
Utilizing Sheer Fabrics
Choosing lightweight materials for coverings can significantly enhance the flow of sunlight. Translucent drapes or light curtains offer the perfect balance, filtering harsh rays while still illuminating the room. By opting for lighter colors, one can reflect additional light, thus creating a serene and spacious feel.
Reflective Surfaces and Accents
Another effective strategy involves the use of reflective elements strategically placed within a room. Incorporating mirrors or glossy finishes can amplify the incoming light, making spaces appear larger and brighter. Metallic features combined with a minimalist approach can bring a contemporary flair while optimizing luminosity.
Q&A: Home furniture laziest window header trim
What are some easy and stylish furniture ideas to complement the laziest window header trim?
To enhance the aesthetic of your home with minimal effort, consider opting for low-profile furniture with clean lines that won’t compete with the window header trim. A sleek sofa or a contemporary daybed can serve as a chic focal point while maintaining a relaxed vibe. Adding a simple coffee table with a glass top can also help in creating an airy feel. For added dimension, try using layered textiles—like a soft throw or patterned cushions—that can bring in color and texture without overwhelming the space.
How can I choose colors and materials for furniture that will look good with my window header trim?
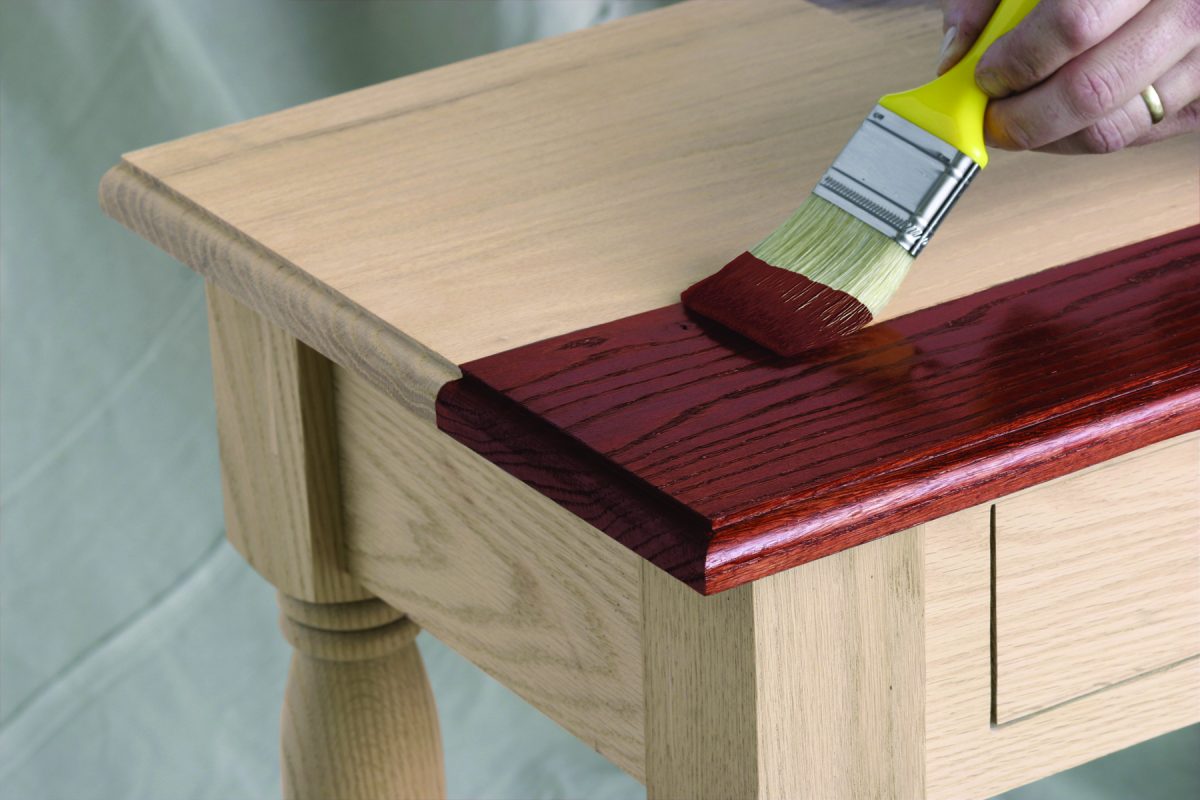
When selecting colors and materials for your furniture, it’s essential to consider the existing tones and textures of your window header trim. If your trim features a natural wood finish, opt for furniture in complementary earthy tones like greens, browns, or grays. For modern trims that are painted in bold or neutral colors, consider using striking contrasting colors or patterns to create an eye-catching visual balance. Materials like light woods, metals, or soft fabrics can effortlessly blend or contrast with the trim, enhancing the overall styling. Remember to keep the furniture’s scale in mind to ensure it harmonizes well with the existing architecture.
How do I install window trim the easy way around a new window frame?
To install window trim the easy way around a new window frame, start by cutting 1×4 pieces to create the two side trims, making sure they are the same length as the height of the window plus any desired overhang. Cut a 1×6 for the header, ensuring it’s the width of the window plus 8 inches for an overhang ledge on each side. Attach the side trim pieces using a nail gun, nailing them into place while checking with a level to make sure that they are straight. Next, nail the header making sure it sticks out on both sides equally. Add an apron piece below the window sill and secure everything with wood glue and nails.
What is the best way to finish the window sill and window casing for a DIY window trim project?
To finish the window sill and window casing for a DIY window trim project, cut the window sill so that it extends 5 inches of overhang ledge on each side of the window frame. Nail the pieces down, and use wood glue on the back of the piece to ensure a strong bond. Once everything is nailed into place, use caulk around the edges to create a seamless finish. Fill any nail holes with wood filler, and sand the surface smooth. After that, paint or stain the window trim to match the wall color or to create a contrast as per your preference.
How do I create a Craftsman-style window trim throughout the house?
To create Craftsman-style window trim throughout the house, you’ll need pieces such as 1×6 for the header, 1×4 for the side trim, and 1×2 for any additional details. Start by cutting the 1×4 pieces to fit the height of the window. Nail them in place on either side of the window frame, using a nail gun. Then, cut a 1×6 for the top, making sure it is longer than the 1×4 pieces and allows for an overhang ledge on each side. Add a 1×2 trim under the header to give it a more elaborate look, and nail it in place. Finish the trim with caulk, wood filler, and a fresh coat of paint to complete the Craftsman style.
How do I install door trim to match window and door casings in a guest bedroom?
To install door trim that matches window and door casings in a guest bedroom, first measure the door frame and cut 1×4 pieces for the sides. These should be cut to the length of the door jamb. Nail the two side pieces to the door jamb, ensuring they are flush with the wall. Cut a 1×6 for the header piece and attach it above the door frame, making sure it extends beyond the side pieces by at least 1 inch on both sides for a consistent look. Use a nail gun to secure the trim, and then caulk any gaps and fill nail holes to give a finished appearance. Paint the trim to match the existing color in the room.
What materials are required for a DIY window trim project?
For a DIY window trim project, you will need several key materials: 1×4 pieces for side trims, a 1×6 for the header, a nail gun, wood glue, caulk, a level, and trim molding for any additional details. You’ll also need a table saw for cutting the trim pieces, drywall screws if necessary, and Zinsser or another primer for painting. To finish the window trim, sandpaper, wood filler for nail holes, and paint or stain are essential. Optional items include fancy top pieces if you want a more elaborate design, and wainscoting to match the trim style throughout the house.
How do I measure and cut the pieces for a window trim to ensure they fit properly?
To measure and cut the pieces for a window trim, start by measuring the width and height of the window. The two side pieces should be cut to the height of the window plus any desired overhang (generally 4-5 inches). The header piece should be cut to the width of the window plus 8 to 10 inches, to allow for overhang ledges on either side. Cut the apron to match the width of the window. Make sure to use a level when placing the trim around the window to keep it straight. Cut your 1×6 for the header and your 1×4 pieces for the sides, ensuring straight cuts to maintain a consistent look throughout.
What steps are involved in caulking and finishing a window trim in the living room and dining room?
For caulking and finishing a window trim in the living room and dining room, start by nailing all pieces together and making sure everything is securely attached and level. Once all trim pieces are nailed in place, use caulk to fill the gaps between the trim and wall. Be sure to caulk along the top of the window casing and all joints where trim pieces meet. After caulking, fill all nail holes with wood filler, then sand the entire window trim to smooth out any imperfections. Once it’s sanded, apply a coat of primer, like Zinsser, to the trim. Finally, paint the trim with your chosen color to match the existing décor in the room.
What tips can you offer to ensure that the window trim is installed straight and flush?
To ensure that the window trim is installed straight and flush, always use a level to make sure each piece is aligned before nailing it into place. Start with the side pieces of the window trim and ensure they are plumb by checking with a level. When placing the header, make sure it is centered and that it sticks out equally on both sides. Nail the pieces down using a nail gun, but be sparing with the nails to avoid excessive holes to fill. Wood glue can also help to keep the pieces flush with the wall before nailing. Using a level at every step will ensure that all pieces are straight and aligned for a clean, professional finish.
How do I add molding and wainscoting to enhance the window trim in a bedroom?
To add molding and wainscoting to enhance the window trim in a bedroom, start by installing the basic window trim with 1×4 pieces for the sides, a 1×6 for the header, and an apron below the window. Once these are nailed in place, add crown molding above the header to give the trim a more decorative appearance. You can also add additional 1×2 pieces beneath the header to create a layered effect. For wainscoting, install paneling or decorative trim along the lower half of the wall, ensuring that it aligns with the window trim. Finish by caulking all gaps, sanding, and painting the wainscoting and window trim to match or complement the wall color.