Creating a harmonious atmosphere in the kitchen goes beyond selecting the right appliances; it involves a thoughtful approach to their integration within the overall setting. Achieving a seamless look not only elevates the visual appeal but also enhances the functionality of the space. By surrounding essential equipment with tailored constructions, you can transform utilitarian objects into stylish features that complement your interior design.
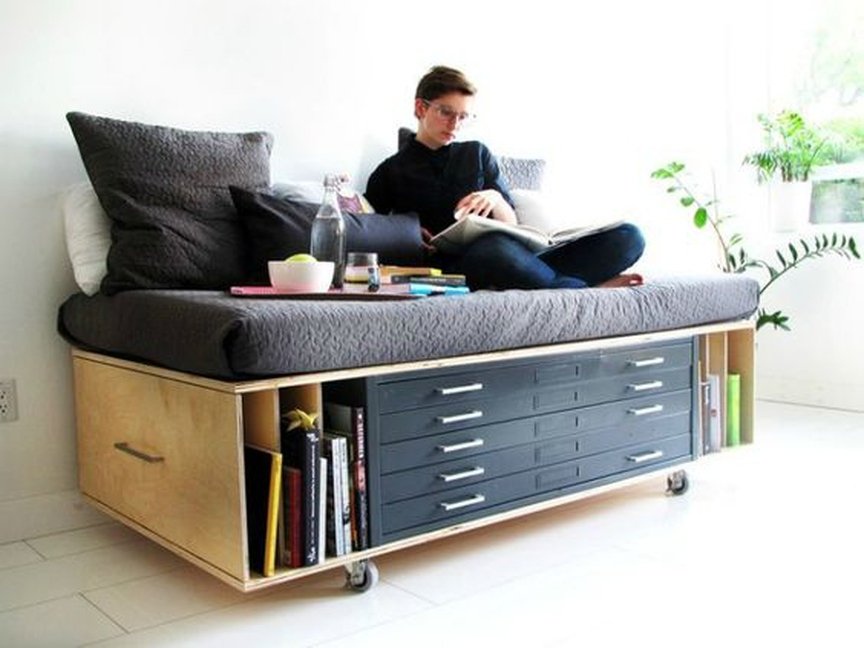
This endeavor represents an excellent opportunity to blend practicality with creativity. Custom enclosures can provide additional storage while simultaneously fostering an organized environment. Serenity in the kitchen can be attained by considering how various elements come together to form a cohesive design. With a strategic mindset and the right inspiration, you can embark on a journey to create an inviting and efficient culinary setting.
Engaging in this endeavor encourages innovation and personalization, allowing you to reflect your unique aesthetic preferences. Whether you lean towards modern minimalism or classic charm, crafting a distinctive framework can elevate your cooking area to new heights. Embrace the challenge of transforming mundane necessities into striking focal points that enhance the enjoyment of your culinary experiences.
Choosing the Right Materials for Construction
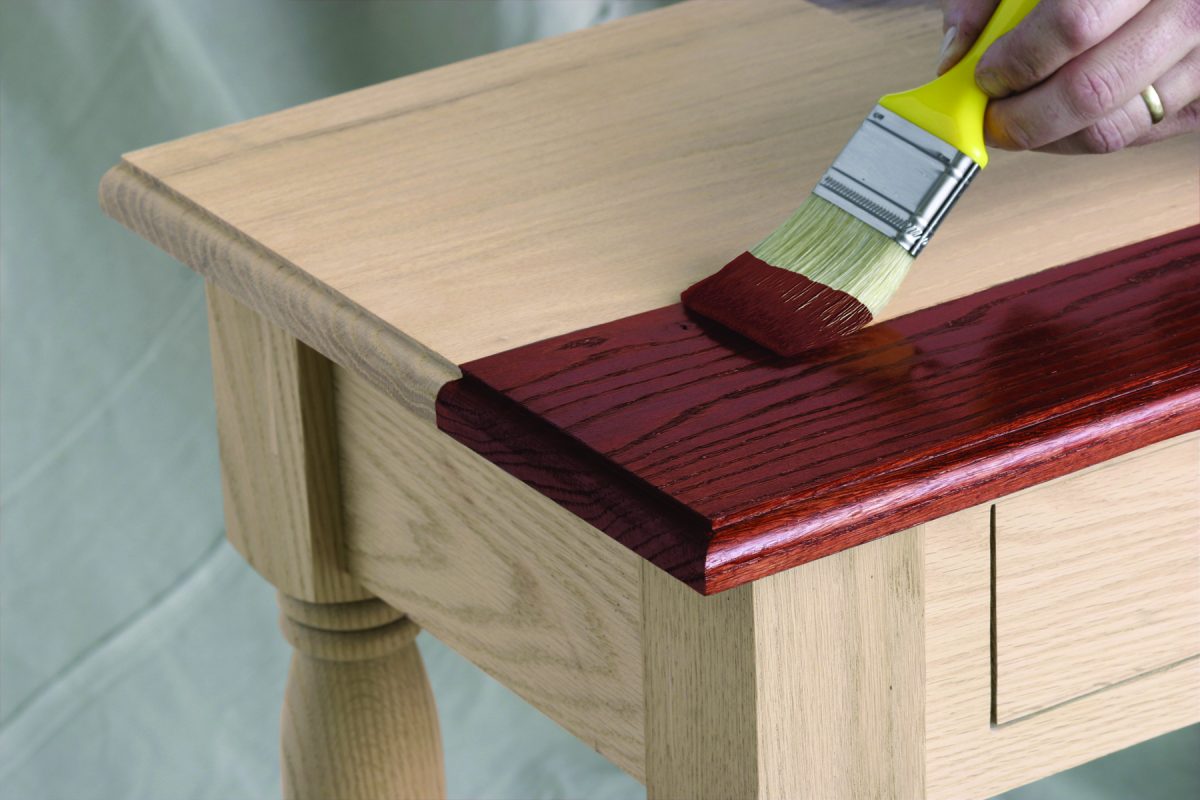
Selecting appropriate substances is crucial in the creation of a functional and aesthetically pleasing structure. The choice of elements not only influences durability but can also impact the overall look and feel of the finished piece. Various options exist, each with their own advantages and considerations.
When contemplating the best materials, it is essential to consider the following factors:
-
Durability: Choose options that withstand wear and tear over time.
-
Aesthetic Appeal: Select components that enhance the visual aspects of the space.
-
Maintenance: Consider how easily certain materials can be cleaned and maintained.
-
Cost: Evaluate budget limitations and look for materials that provide a good balance of quality and affordability.
Here are some common materials to contemplate:
-
Wood: A classic choice that offers a warm and inviting appearance. Different varieties, such as oak or maple, provide unique textures and finishes.
-
Laminate: An economical option that mimics the appearance of wood while being resistant to scratches and moisture.
-
Metal: Provides a contemporary vibe, known for its strength and resilience. Stainless steel, for instance, can add a sleek touch.
-
Particle Board: Budget-friendly, often finished with veneer, but may lack the longevity of solid wood. Suitable for low-traffic areas.
By carefully assessing the options and weighing their pros and cons, one can make informed decisions that will lead to a successful creation. Prioritizing both function and design will ensure the final product meets practical needs while complementing the chosen space.
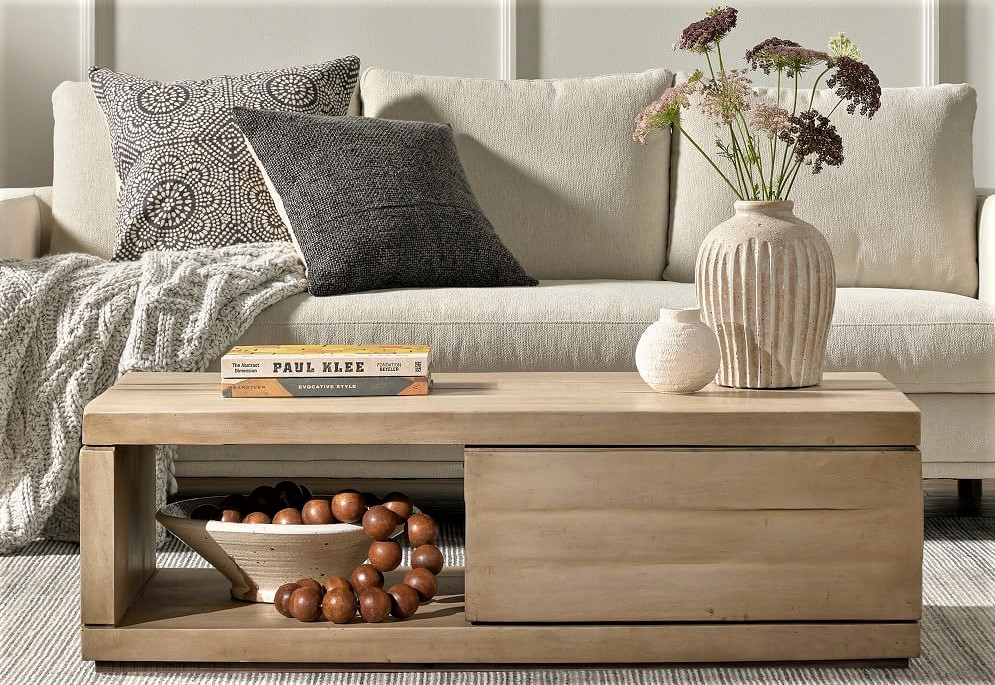
Design Ideas to Enhance Your Kitchen
Transforming the heart of your residence can be an exciting venture, allowing you to create an inviting and functional space. By reimagining layouts, colors, and materials, you can achieve a cohesive aesthetic that suits your lifestyle while maximizing utility. Below are several innovative concepts to elevate the ambiance and organization of your culinary area.
|
Idea |
Description |
|---|---|
|
Open Shelving |
Replace upper cabinets with open shelves to showcase beautiful dishware and add a sense of airiness. |
|
Color Coordination |
Choose a harmonious color palette that blends well with appliances and fixtures for a unified look. |
|
Backsplash Variation |
Incorporate patterned tiles or unique materials as a backsplash to serve as a focal point and conversation starter. |
|
Smart Lighting |
Install adjustable lighting options, such as under-cabinet lights or pendant fixtures, to create ambiance and enhance functionality. |
|
Functional Islands |
Add a multifunctional island that provides extra workspace, storage, and a place for casual dining. |
|
Textured Accents |
Incorporate various textures through materials like wood, metal, and fabric to create depth and interest. |
Implementing these innovative enhancements can breathe new life into your cooking space, making it a delightful environment for both culinary activities and social gatherings.
Step-by-Step Assembly Process Explained
This section outlines the essential phases involved in creating a stylish enclosure for your cooling appliance. By following clear instructions, you can craft a functional and visually appealing structure that seamlessly integrates into your living space. Below are the detailed steps to guide you through the assembly process.
Materials and Tools Needed
Before beginning, ensure you have all necessary items on hand:
-
Wood or composite panels
-
Wood screws and brackets
-
Measuring tape
-
Power drill
-
Saw (if cutting panels is needed)
-
Level
-
Screwdriver
-
Sandpaper
-
Paint or wood finish (optional)
Assembly Steps
-
Measure Your Space: Begin by accurately measuring the area around your cooling unit. This will ensure a correct fit.
-
Prepare Panels: Cut your wood or composite materials to the required dimensions, smoothing the edges with sandpaper.
-
Assemble the Frame: Create a frame structure using the cut panels and secure them together with screws and brackets, ensuring everything is level.
-
Add Side Panels: Attach side panels to the frame, checking for stability as you go along.
-
Install Back Panel: Fix the back panel securely to add sturdiness to the structure.
-
Front Face Installation: Mount the front face of the enclosure, leaving space for the door or opening if needed.
-
Finishing Touches: Sand any rough spots and apply paint or finish to enhance the appearance.
-
Final Check: Ensure all components are tightly secured and the built enclosure is properly aligned with the appliance.
After following these steps, your newly crafted enclosure will be ready to enhance both the functionality and aesthetics of your space.
Essential Tools for the DIY Project
Embarking on a hands-on endeavor requires a myriad of instruments that will facilitate the process and ensure a polished final outcome. Understanding which tools are necessary for this undertaking can streamline your efforts and enhance your efficiency in executing each task.
Basic Hand Tools
Having a well-stocked assortment of hand tools is fundamental. Start with screwdrivers, hammers, and wrenches, as they are versatile implements that can help you navigate various tasks with ease. Additionally, incorporating measuring tapes and levels will enable you to achieve precision in your work, ensuring that everything aligns correctly.
Power Tools
Incorporating power tools can significantly enhance your productivity, allowing you to tackle more complex aspects of the project. Essential items such as a circular saw, drill, and sander can make the cutting, assembling, and finishing processes much smoother. Remember to prioritize safety by using protective gear whenever operating these machines.
Finishing Touches for a Polished Look
Achieving a refined and sophisticated appearance in your space requires attention to detail in the final stages of your project. Carefully selected accents and thoughtful enhancements can create a seamless integration into your existing decor while elevating the overall aesthetic. By implementing these final adjustments, you ensure that your endeavor stands out with elegance and functionality.
Choosing the Right Hardware
Opting for high-quality knobs, handles, and hinges is essential for enhancing both appearance and usability. Consider materials that resonate with the style of your surroundings, whether it’s sleek metal for a modern flair or rustic finishes for a cozy touch. The right hardware can harmonize the design while making the pieces more practical.
Color and Texture Coordination
Incorporating complementary colors and textures adds depth and visual interest to the overall composition. Whether painting, staining, or applying finishes, choose tones that align with your theme and enhance the surrounding elements. Textural contrasts, such as smooth surfaces paired with rustic elements, can also create a dynamic and inviting atmosphere.
Maintenance Tips for Long-Term Use
Ensuring longevity and optimal performance of an enclosed appliance requires a proactive approach to care and upkeep. Regular attention to details can prevent wear and tear while promoting functionality. Here are essential practices to maintain an organized structure around your appliance over time.
1. Regular Cleaning: Dust and debris can accumulate over time, affecting both aesthetics and efficiency. Wipe down surfaces with a damp cloth regularly to keep them free from grime. Pay special attention to hinges, shelves, and any crevices.
2. Inspect for Damage: Periodically examine the entire structure for signs of wear, such as scratches, loose components, or misalignment. Early identification of issues can prevent more significant problems in the future.
3. Temperature Checks: Maintain a consistent environment by monitoring temperature levels. Avoid placing heat-producing appliances close to the unit, as excessive warmth can impact performance.
4. Ventilation Maintenance: Ensure proper airflow by keeping surrounding areas clear. Blocked airflow can strain the functionality of the appliance, reducing its efficiency and prolonging cooling times.
5. Lubricate Moving Parts: If applicable, occasionally lubricate hinges and other moving elements to ensure smooth operation. This simple step can significantly enhance the longevity of the appliance and its enclosure.
By following these practices, you can maintain a pristine and efficient environment that enhances the overall durability and performance of your appliance over the years.
Q&A: Home furniture build refrigerator cabinet surround
What materials do I need to build a refrigerator cabinet surround?
To build a refrigerator cabinet surround, you will need several materials, including plywood or MDF for the cabinet structure, wood screws, wood glue, and a finish such as paint or stain. Additionally, you might want to include trim pieces for a polished look, insulation materials to manage temperature, and possibly, cabinet doors if you want to enclose the refrigerator. Don’t forget to measure your refrigerator and the space in which it will be housed to ensure proper fit and construction!
How do I measure my refrigerator to create the perfect surround?
Measuring your refrigerator for the surround is crucial to ensure a perfect fit. Start by measuring the height, width, and depth of your refrigerator. It’s essential to include extra clearance (about an inch or two) on each side to allow for proper ventilation and easier installation. Additionally, measure the surrounding kitchen space to accommodate the surrounding cabinetry. A good practice is to create a simple sketch with the measurements noted, which will help you visualize the project as you plan it out.
What are some design ideas for a refrigerator cabinet surround?
When designing a refrigerator cabinet surround, there are several ideas you can consider. One popular design includes built-in shelves on either side of the refrigerator for storage or decorative items. Another idea is to have a custom look with raised panel doors to match other cabinetry in your kitchen. You might also consider open shelving above the fridge for additional storage or display space. For a modern twist, you could incorporate accent lighting or a contrasting color to create a focal point in your kitchen. Don’t forget to match the materials and styles with your existing home decor for a cohesive look!
What are the steps to install the refrigerator cabinet surround once it’s built?
Installing the refrigerator cabinet surround involves several key steps. First, ensure that the surround’s base is level and stable. Position the surround around your refrigerator, checking again that you have left enough clearance for ventilation. Use a level to ensure everything is aligned correctly. If your design includes cabinet doors or shelves, attach them before securing the surround to the wall to prevent any wobbling. After securing the surround, finish it with paint, stain, or trim as needed for a polished look. Finally, place your refrigerator back into the surround, ensuring it fits snugly but has the required clearances.
Can I do this project myself, or do I need professional help?
Building a refrigerator cabinet surround can be a DIY project if you have basic carpentry skills and access to the necessary tools. It’s essential to be comfortable with measuring, cutting, and assembling wood. However, if you feel unsure about any aspect of the project, such as design complexity or installation, seeking professional help can be beneficial. Hiring a professional can also save time and ensure a high-quality finish that matches your vision. Regardless of your choice, it’s important to carefully plan and prepare before starting this project to ensure a successful outcome!
What are the key steps involved in building a refrigerator cabinet surround?
Building a refrigerator cabinet surround involves several critical steps to ensure a professional and functional finish. First, you’ll want to start by measuring your refrigerator’s dimensions and the surrounding area to determine the space available for the cabinet. Next, select the materials you will use, such as plywood, MDF, or solid wood, depending on your desired look and durability. After that, create a design plan, considering factors like style and additional features like shelves or a countertop.
How can you build a DIY refrigerator cabinet to give your kitchen a custom look?
You can build a DIY refrigerator cabinet to make your kitchen look custom without spending a ton of money. To do this, you’ll need sheets of plywood, a table saw, and other basic tools. Start by creating a cabinet box with a face frame that will surround your refrigerator. Use shims to help secure the cabinet to the wall properly and ensure that everything is level. Adding crown molding and finish trim to the top of the cabinet will create a polished, built-in look that blends seamlessly with your existing kitchen cabinetry.
What are some great options for ending cabinetry and creating a balanced kitchen cabinetry design?
Adding a fridge cabinet or a refrigerator surround cabinet is a great option for ending cabinetry and creating a balanced kitchen cabinetry design. This helps fill in unused space around your refrigerator, making the kitchen look more built-in and cohesive. You can add trim or panels to the sides of the cabinet box and install crown molding at the top for a finished, custom look. This can make a kitchen look custom and well thought out, adding to the overall style of your kitchen.
How do you use pocket holes when building a refrigerator surround cabinet?
When building a refrigerator surround cabinet, pocket holes are used to secure different pieces of the cabinet together, such as the face frame to the cabinet box. A pocket hole jig can help you make precise holes to create strong joints. Once the pieces are aligned, wood screws are used to attach them securely. This technique is particularly useful for attaching the panels and shelves in the fridge cabinet without spending too much time or effort, ensuring a solid structure.
How can crown molding be added to a fridge cabinet for a more finished look?
Adding crown molding to the top of the refrigerator surround cabinet is a great way to enhance the look of your kitchen. Once the main cabinet is in place, measure the perimeter of the top and cut the crown molding using a table saw at the appropriate angles. Use wood glue and a nail gun to secure the molding to the top of the cabinet. This addition gives a polished, built-in appearance, making the kitchen look custom and more aesthetically pleasing.
What materials do you need to build a refrigerator surround cabinet?
To build a refrigerator surround cabinet, you will need materials such as sheets of plywood for the cabinet box, a piece of wood for the cabinet shelf, shims to help level the cabinet, and 1×2 boards for the face frame. You will also need a table saw for cutting the panels, crown molding to finish the cabinet top, and caulk to fill in any gaps. Additional tools include pocket hole jigs, wood screws, and possibly a nail gun. Using these materials will help you create a refrigerator cabinet that fits seamlessly into your kitchen cabinetry, adding extra storage and improving the overall look of the space.