Transforming the appearance of your timber projects can be both an art and a science. The journey to elevate the aesthetic and durability of wooden materials involves a careful selection of methods, materials, and practices. Whether you’re aiming for a rich, deep finish or a light, natural look, gaining mastery over various approaches ensures that your end result reflects your vision.
Understanding the nuances of finishing can significantly influence the longevity and beauty of your creations. This journey encompasses selecting proper formulations, preparing your surfaces for the application, and executing techniques that yield remarkable outcomes. Every detail matters, from the choice of tools to the environmental conditions during application.
By exploring essential strategies and insights shared herein, you will elevate your craftsmanship to new heights. The knowledge acquired will empower you to make informed decisions, ensuring that your wooden projects not only look stunning but also withstand the test of time. Your endeavors will truly shine through thoughtful application and a keen understanding of materials.
Choosing the Right Wood Stain
Selecting the appropriate finish for your timber project is crucial to achieving the desired aesthetic and durability. With myriad options available, understanding the characteristics of different formulations is essential for ensuring long-lasting results and enhancing the natural beauty of the material.
Begin by considering the type of surface you will be applying your finish to. Different kinds of timber may react uniquely to various formulas, affecting the final appearance and longevity. Additionally, evaluate the environment in which the item will be placed. For instance, exterior applications require more robust protections against moisture and UV exposure.
When looking at colors, it is important to choose shades that complement the overall design of your space. Consider the undertones of the selected variety; each type can shift the color palette significantly. Testing samples on a small, inconspicuous area can provide a clearer picture of how the hue interacts with the grain and texture before committing to a larger application.
Lastly, reflect on the application method you prefer, as some are more suited for DIY projects than others. Options range from brush-on formulas to pre-mixed sprays, each offering unique benefits and requiring varying levels of skill. Ultimately, understanding these elements will lead to a successful transformation of your wooden items.
Preparing Wood for Staining
To achieve a beautiful and long-lasting finish, adequate preparation of the surface is crucial. This initial step sets the foundation for the application process, allowing for an even absorption of the product and highlighting the natural grain. By dedicating time to prepare the material, you can ensure a stunning outcome that enhances the overall aesthetic.
Steps for Effective Preparation
Follow these essential steps to ensure the timber is ready for treatment:
-
Cleaning the Surface: Remove any dirt, dust, or old finishes using a mild detergent and water solution or a dedicated cleaner.
-
Sanding: Smooth the surface with sandpaper, starting with a coarser grit and gradually moving to a finer grit. Always sand in the direction of the grain.
-
Removing Dust: Wipe the surface with a damp cloth or tack cloth to remove all sanding dust.
-
Moisture Check: Ensure the timber has the appropriate moisture content; ideally, it should be between 6% and 8%. Use a moisture meter if necessary.
Additional Considerations
Taking a few extra steps can significantly enhance the outcome:
-
Test Area: Apply the selected product on a small, inconspicuous area to assess color and absorption.
-
Sealing Edges: In some cases, consider sealing the edges with a pre-stain conditioner to prevent uneven absorption.
-
Temperature: Work in a controlled environment; temperatures between 50°F and 90°F are ideal for application.
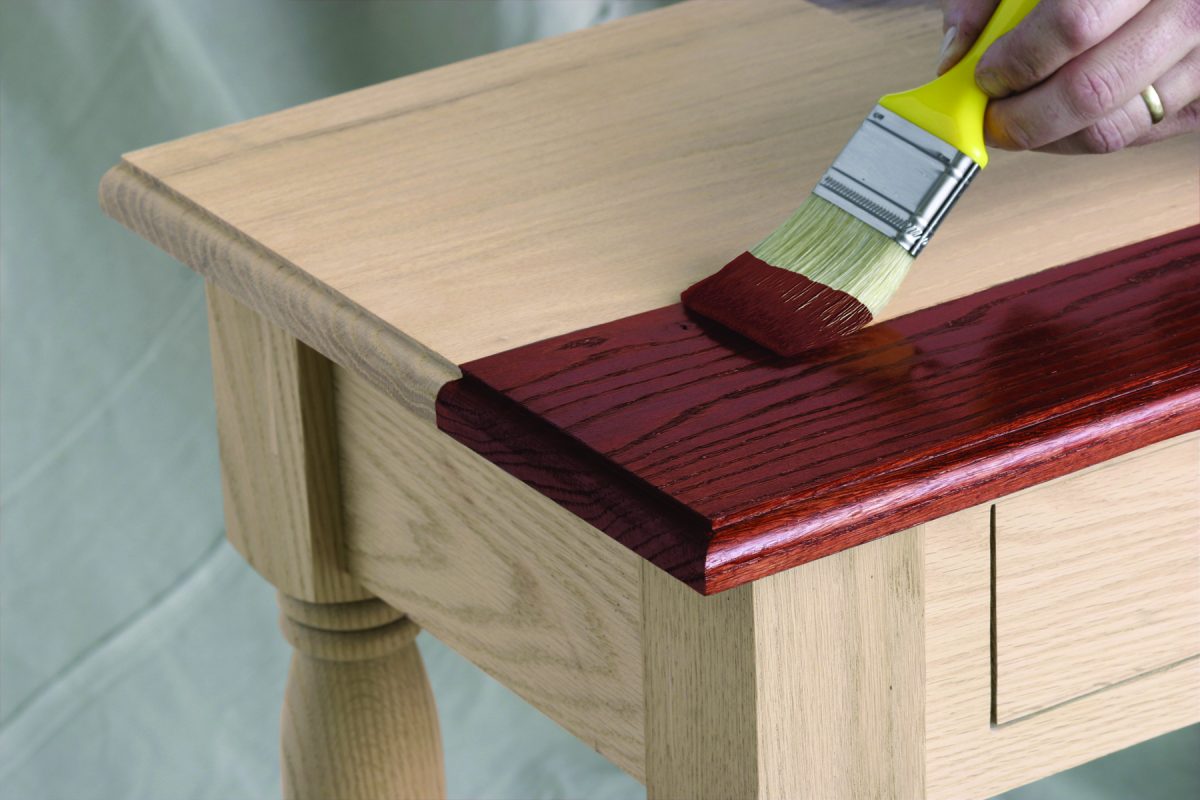
Application Techniques for Even Coverage
Achieving a uniform appearance when applying color to surfaces is essential for enhancing the beauty of your project. Consistency in application not only ensures a pleasing aesthetic but also contributes to the durability of the finish. Various methods can be employed to attain an even layer of color, allowing you to achieve professional results in your endeavors.
Preparation is Key
Before beginning the application process, proper surface preparation plays a crucial role in the final outcome. Make sure to clean the area thoroughly and remove any dirt, grease, or old finishes. Sanding the surface gently can help promote better adhesion. A smooth surface leads to more effective and even application.
Choosing the Right Application Tool
The selection of your application instrument can significantly influence the outcome. Whether you opt for brushes, rollers, or cloths, each tool has its strengths. Brushes are excellent for detailed work and reaching tight corners, while rollers can cover larger expanses efficiently. Using the right tool will help in spreading the product evenly across the surface. Additionally, maintaining a consistent pressure and technique throughout the application is vital for achieving a flawless finish.
Common Mistakes to Avoid
When embarking on a project involving the enhancement of natural surfaces, it is crucial to steer clear of common pitfalls that can compromise the final outcome. Understanding these missteps can help ensure a flawless finish and showcase the inherent beauty of the material.
|
Mistake |
Description |
Prevention |
|---|---|---|
|
Skipping Preparation |
Neglecting to properly clean and sand the surface can lead to uneven application. |
Always clean and sand thoroughly before starting the process. |
|
Using Improper Tools |
Using the wrong applicators can cause streaks or uneven coatings. |
Select tools that are specifically designed for the task at hand. |
|
Ignoring Temperature and Humidity |
High humidity or extreme temperatures can affect absorption and drying times. |
Check environmental conditions prior to applying any product. |
|
Applying Too Thickly |
Overapplication can lead to runs and a sticky finish. |
Apply in thin layers and build up as necessary. |
|
Not Testing First |
Failing to test on a small area may result in unwanted colors or finishes. |
Always do a test run on a hidden section or scrap piece. |
By remaining vigilant and informed about these frequent errors, one can significantly enhance the overall effectiveness of their enhancement endeavors, leading to a more polished and lasting result.
Top Finishing Products and Tools
Choosing the right materials and equipment is essential for achieving the desired look and longevity in your projects. Having a solid selection of finishing products and the proper tools can elevate the quality of your work and streamline the process. Below are some recommended options that can help you enhance the final outcome.
Recommended Products
-
Finishes: Consider using various finishes such as oils, varnishes, and lacquers that cater to your specific needs and preferences.
-
Stains: Look for water-based or oil-based stains depending on the depth of color and ease of application you desire.
-
Sealants: A good sealant will help protect your surface from moisture and wear, prolonging its lifespan.
Essential Tools
-
Brushes: High-quality natural bristle or synthetic brushes are vital for smooth application.
-
Rollers: For larger surfaces, rollers can speed up the process while ensuring an even coat.
-
Rags: Lint-free rags are essential for wiping excess product and achieving a clean finish.
-
Sandpaper: Various grits will help prepare surfaces for application, ensuring better adhesion and a smoother final result.
-
Sprayers: Airless or HVLP sprayers can provide a fine mist of product for an even and professional finish.
By selecting the right finishing products and utilizing appropriate tools, you can optimize your projects and achieve professional-looking results that will stand the test of time.
Maintaining Stained Wood Surfaces
Proper care of stained surfaces is essential for ensuring their longevity and beauty. Regular maintenance not only enhances the aesthetic appeal but also protects the material from potential damage caused by environmental factors over time. Understanding the appropriate methods for upkeep helps preserve the integrity of the finish and prolongs its life.
Regular Cleaning
Keeping stained surfaces clean is crucial for maintaining their appearance. Follow these recommendations:
-
Use a soft cloth or microfiber towel to dust surfaces regularly.
-
Dampen the cloth slightly with water or a mild soapy solution to remove dirt and grime.
-
Avoid using abrasive cleaners or scrubbers that can scratch the finish.
Reapplication of Finish
Over time, the protective layer on stained surfaces may wear down. It’s important to know when to refresh the finish:
-
Inspect the surface regularly for signs of wear, such as dullness or discoloration.
-
Clean the surface thoroughly before applying a new coat.
-
Choose a finish that matches the original to maintain consistency in appearance.
Q&A: Ultimate wood staining guide
What are the different types of wood stains available, and how do I choose the right one for my project?
There are several types of wood stains available, including oil-based, water-based, gel stains, and lacquer-based stains. Oil-based stains penetrate deeply into the wood and usually provide richer colors, while water-based stains dry faster and have lower VOCs (volatile organic compounds), making them more environmentally friendly. Gel stains are thicker and ideal for vertical surfaces, preventing dripping and uneven application. To choose the right stain, consider the type of wood you are working with, the desired finish, and the environmental conditions in which you’ll be working. Always test a small area first to see how the stain reacts with your wood.
How can I prepare wood for staining to ensure an even and professional finish?
Preparing wood properly is critical to achieving an even and professional finish. Start by sanding the wood with progressively finer grits of sandpaper, beginning with a coarse grit (around 80) and moving to a finer grit (220 or higher). This process smooths the surface and opens up the wood’s pores. After sanding, clean the surface with a tack cloth to remove any dust particles. If you’re working with softwoods or wood that has knots, consider applying a wood conditioner before staining to ensure an even absorption of the stain. Additionally, make sure the wood is completely dry and free from any finishes or contaminants before proceeding.
What techniques can I use to apply wood stain evenly and avoid streaks?
To apply wood stain evenly and avoid streaks, use a high-quality applicator such as a foam brush, lint-free cloth, or a natural bristle brush. Begin by applying the stain in the direction of the wood grain, using long and even strokes. Work in small sections to maintain a wet edge, which helps prevent lap marks. After applying the stain, wait for a few minutes (according to the manufacturer’s instructions), then wipe off any excess with a clean cloth, again following the grain of the wood. For a more controlled application, consider using a spray applicator for large projects or intricate pieces. Always perform a test on a scrap piece to refine your technique before tackling the main surface.
What are some common mistakes to avoid when staining wood?
Some common mistakes to avoid when staining wood include not adequately preparing the wood’s surface, applying too much stain, and failing to follow the manufacturer’s instructions. Improper surface preparation, such as skipping sanding or not cleaning sawdust, can lead to an uneven finish. Overapplying stain can cause a sticky surface and uneven color; it is crucial to wipe off excess stain to allow for proper drying. Additionally, using the wrong applicator can affect the finish, so always choose an appropriate tool for your project’s size and intricacy. Lastly, ensure you’re working in the right environmental conditions — avoid extreme temperatures or humidity, which can negatively impact the staining process.
What is the best wood stain for achieving a natural color finish on interior wood projects?
The best wood stain for achieving a natural color on interior wood is often a water-based wood stain. It preserves the natural beauty of the wood while being easy to apply and clean up. For an even finish, it’s best to use a pre-stain wood conditioner to help the stain penetrate the wood evenly, especially on softer woods.
How can you prevent wood from staining unevenly on your next project?
To prevent wood from staining unevenly, it’s important to first sand your wood thoroughly and use a pre-stain wood conditioner. This helps ensure that the stain penetrates the wood evenly, reducing blotchiness. Applying multiple coats of stain also allows you to build up the color gradually without causing the stain to dry too quickly or absorb unevenly.
What type of stain is best for exterior wood projects, and why?
For exterior wood projects, it’s best to use oil-based wood stains or solid stains. These types of stains penetrate deeply into the wood, providing a protective barrier against moisture and the elements. Oil-based wood stains are durable, long-lasting, and are ideal for enhancing the natural beauty of exterior wood while protecting it from weather damage.
How does a comprehensive guide to wood stain help with choosing the right product for your project?
A comprehensive guide to wood stain provides valuable information on different types of stains, such as oil-based and water-based stains, and their applications. It explains how to apply stain, how to choose the right stain color, and tips for preparing the wood. This guide is essential for both beginners and professionals, helping you stain wood like a pro by understanding the best techniques for each type of wood and finish.
Why is it important to allow the stain to dry completely between coats when working on wood finishes?
Allowing the stain to dry completely between coats is crucial for achieving an even and rich color. If the stain doesn’t dry properly, it can result in uneven color or cause the wood to absorb stain inconsistently. A single coat of stain may not always be enough, so applying multiple coats and allowing sufficient drying time ensures a smooth, professional-looking wood finish.