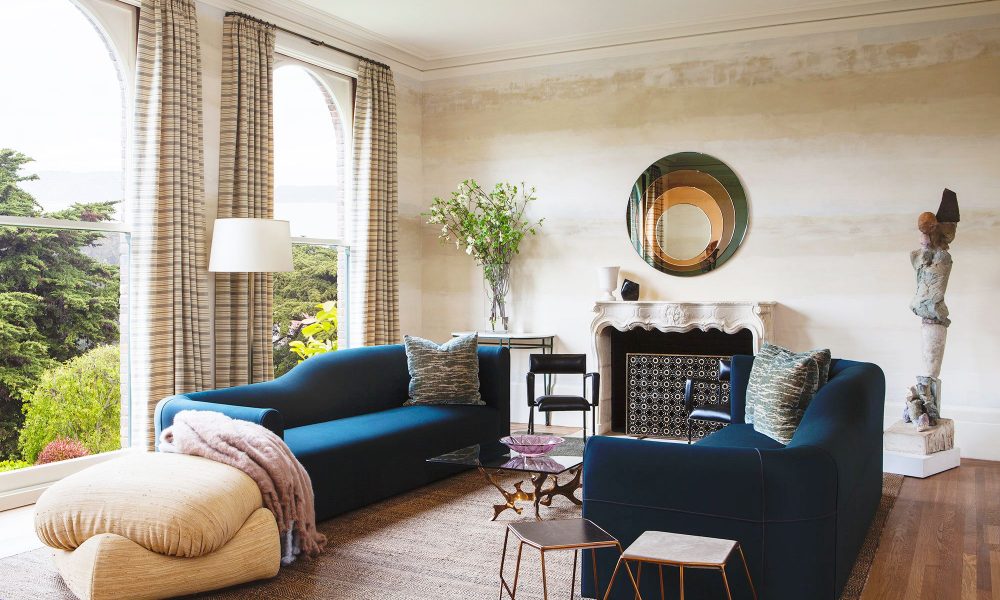
The realm of interior enhancements holds infinite possibilities for transformation, serving as the foundation upon which aesthetics and functionality coexist. The thoughtful integration of decorative elements can elevate a living space, bringing elegance and character to any room. As one navigates this intricate landscape, knowledge of the elements involved becomes paramount.
In this exploration, we delve into the various styles and techniques that can be employed to enrich the edges of walls, creating visual cohesion throughout the environment. Understanding the nuances of these ornamental accents paves the way for not only enhancing your surroundings but also for allowing personal creativity to shine.
From selecting suitable materials to mastering the assembly process, each step plays a critical role in achieving a harmonious finish. This endeavor invites both new aficionados and seasoned craftsmen to engage in a journey of inspiration and skill, ultimately leading to the creation of inviting and sophisticated spaces.
Essential Types of Baseboard Trims
When it comes to enhancing the aesthetic appeal of your interiors, the choice of lower wall coverings plays a significant role. These architectural elements not only contribute to the overall decor but also serve practical purposes, such as protecting walls from scuffs and damage. Understanding the various types available can help you make an informed decision that complements your space.
|
Type |
Description |
Best Use |
|---|---|---|
|
Cased |
Featuring a smooth finish, cased options offer a seamless look that blends well with modern aesthetics. |
Contemporary settings with minimalistic decor. |
|
Colonial |
These have a more ornate profile, often featuring curves and detailed patterns, bringing character to traditional spaces. |
Historic or classic-designed interiors. |
|
Modern |
Sleek and angular, modern styles enhance a cutting-edge look with clean lines and simplicity. |
Urban or minimalist environments. |
|
Traditional |
Combining elegance with sturdiness, traditional selections often include rounded edges and are commonly made of wood. |
Classic homes aiming for timeless appeal. |
|
Board and Batten |
Utilizing vertical strips of wood, this style creates texture and depth, preferably in taller ceilings. |
Spaces needing a rustic or farmhouse vibe. |
Selecting the right variety is crucial for achieving a harmonious look that resonates with your individual tastes and the atmosphere you wish to create. By considering the characteristics and intended ambiance of your living spaces, you can ensure a cohesive integration of these essential elements.
Tools Required for Installation
Successfully completing a project requires the right set of instruments. Having the necessary items on hand ensures efficiency and precision, reducing the likelihood of errors during the process. Below is a list of vital tools that will aid you in achieving a flawless finish.
|
Tool |
Description |
|---|---|
|
Measuring Tape |
Essential for accurately measuring lengths and widths to ensure a perfect fit. |
|
Miter Saw |
Used for cutting pieces at precise angles, especially for corners. |
|
Nail Gun |
Speeds up the fastening process by driving nails into the material efficiently. |
|
Hammer |
A basic hand tool useful for manual nailing and adjustments. |
|
Level |
Ensures that elements are installed evenly and horizontally. |
|
Chisel |
Helpful for making fine adjustments and creating precise cuts. |
|
Caulking Gun |
Used for applying caulk to fill gaps, ensuring a seamless appearance. |
Step-by-Step Installation Process
Executing a successful setup of your decorative wall finish requires careful planning and precise action. The following stages will walk you through the essential tasks needed to achieve a polished and professional look in your living space.
1. Gather Materials and Tools
Before beginning, ensure you have all necessary supplies on hand. This includes suitable paneling, adhesive, nails, a measuring tape, a saw, a level, and a hammer. Proper preparation is crucial for a seamless process.
2. Measure the Area
Carefully measure the length of the walls where you plan to install the moldings. Take multiple measurements to account for any irregularities and ensure accuracy. Document your findings to avoid confusion during the cutting phase.
3. Cut the Panels
Using a saw, cut each section to the precise lengths previously noted. For a clean edge, consider cutting at a 45-degree angle at the corners. An accurate cut is vital for a snug fit that enhances the overall aesthetic.
4. Prepare the Wall
Before affixing anything, ensure the surface is clean and free of obstructions. Remove any old materials that may interfere with the new installation, and fill in any holes or imperfections to create a smooth foundation.
5. Position the Elements
Begin placing the cut pieces against the wall, starting from one corner. Use a level to verify that each segment is straight. Adjust as necessary before securing them into place. This step is crucial for ensuring a balanced appearance.
6. Secure the Pieces
Once satisfied with positioning, use adhesive and/or nails to firmly attach each section. Pay attention to every joint, as proper fastening prevents gaps and potential damage over time.
7. Final Touches
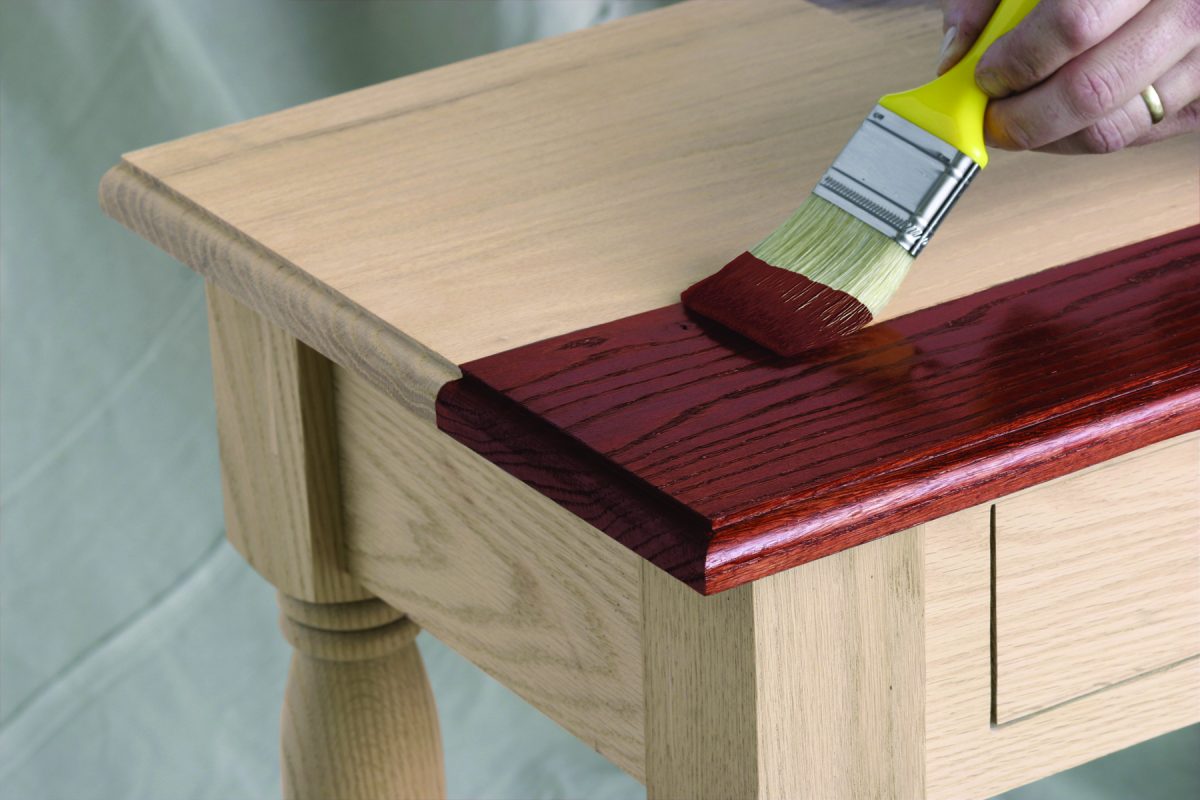
After securing the pieces, inspect the edges to ensure a uniform look. Use caulk to fill in any seams or gaps, then sand the edges for a smooth finish. Finally, consider painting or staining for a personalized touch, if desired.
By following these organized steps, you can achieve an attractive and enduring addition to your space, elevating its overall appeal and character.
Creative Design Ideas for Your Home
Transforming the atmosphere of your living space can be an exciting endeavor that reflects your personality and style. A few thoughtful enhancements can elevate the overall aesthetic, making it more inviting and unique. This section explores imaginative concepts that can reinvigorate any area, showcasing how subtle changes can have a profound impact.
One innovative approach is to incorporate architectural elements such as molding or custom accents to create depth. This can be achieved through varied profiles, colors, or materials, allowing for a blend of traditional and contemporary vibes. Experimenting with contrasting shades can draw attention to specific features, enhancing visual interest throughout the area.
Another fascinating idea involves layering textures. Integrating materials like wood, metal, and fabric in a cohesive manner adds richness, fostering a dynamic yet harmonious environment. Pairing soft textiles with hard surfaces can create a balanced feel, increasing comfort without sacrificing elegance.
Additionally, utilizing color strategically can significantly alter the perception of space. Employing a bold hue for an accent wall or decorative elements can inject energy into a room, while softer tones may evoke serenity. Consider also the psychological effects different shades can bring forth, guiding the ambiance in a desired direction.
Finally, personal touches through artwork or unique decor items can undeniably enhance charm. Curating a collection of pieces that resonate with your story fosters connection and makes the space feel distinctly yours. Embrace creativity, and let your surroundings tell your own narrative.
Common Mistakes to Avoid
Many individuals encounter pitfalls when enhancing their interior aesthetics. A few missteps can lead to frustration and unsatisfactory outcomes. Awareness of these common errors is crucial for achieving the desired result without unnecessary setbacks.
-
Neglecting Proper Measurements: Failing to accurately measure the space can result in ill-fitting pieces. Always double-check dimensions before making a purchase.
-
Overlooking Style Compatibility: Selecting elements that clash with existing decor can disrupt the visual flow. Ensure that new additions harmonize with the surroundings.
-
Using Inappropriate Materials: Some materials may not suit specific environments, leading to wear and tear. Research suitable options for different rooms.
-
Skipping Preparation Work: Rushing into installation without proper preparation can cause complications later. Prep surfaces and plan the layout beforehand.
-
Ignoring Professional Assistance: Underestimating the value of expert advice can lead to mistakes. Consult with professionals for guidance on complex projects.
Avoiding these common blunders will help ensure a smoother process and a more rewarding outcome for any interior enhancement project.
Maintenance Tips for Longevity
Ensuring the durability and aesthetic appeal of your interior embellishments involves consistent care and attention. By adhering to a few straightforward practices, you can preserve the natural beauty and functionality of these elements, preventing wear and tear as well as extending their lifespan.
Regular Cleaning
Routine cleaning is essential for maintaining the integrity of your installations. Use a gentle dust cloth or a soft broom to remove dust and debris, which can accumulate over time. For deeper cleaning, opt for a mild solution of soap and water, applied with a soft sponge. Avoid harsh chemicals that can damage the finish.
Protection from Moisture and Damage
Exposure to moisture can lead to warping and degradation. Ensure proper ventilation in areas prone to humidity, such as kitchens and bathrooms. Additionally, consider applying a protective sealant to guard against scratches and impacts. Regular inspections for any signs of damage should not be overlooked, allowing for prompt repairs before issues worsen.
Q&A: Home furniture baseboard trim
What is baseboard trim and why is it important in home design?
Baseboard trim is a type of wooden or synthetic molding that is installed at the juncture of the wall and the floor. It serves several functions, including covering up the gap between the wall and floor, protecting the walls from damage from furniture and foot traffic, and enhancing the overall aesthetic of a room. Baseboards can come in various styles, widths, and materials, allowing homeowners to choose options that match their interior decor. Additionally, they can add a finishing touch to a space, making it feel more complete and polished.
What are the different styles of baseboard trim, and how do I choose the right one for my home?
Baseboard trim is available in a variety of styles, including traditional, modern, and contemporary designs. Common styles include flat, rounded, and ornate profiles. When choosing the right one, consider the overall theme of your home. For instance, if you have a modern home with clean lines, a simple flat baseboard may work best. On the other hand, if your home features classic architecture, you might opt for an intricate, detailed design. Also, consider the height of the baseboard; taller trims can create a dramatic effect, while shorter trims may offer a subtle look.
What tools and materials do I need for installing baseboard trim myself?
To install baseboard trim yourself, you’ll need a few essential tools and materials. Key tools include a miter saw or a handsaw, a measuring tape, a level, a nail gun or hammer for fastening, wood glue, caulk, and a paint or primer for finishing. Materials typically include the baseboard trim itself, finishing nails, and any additional molding or corner pieces. It’s important to measure your space accurately to ensure you purchase the right amount of trim. Having sharp, quality tools will also help ensure a clean and professional-looking installation.
What are the common mistakes to avoid during baseboard trim installation?
Some common mistakes during baseboard trim installation include improper measurements, which can lead to gaps or misaligned pieces. Always double-check measurements before cutting. Another mistake is using the wrong type of adhesive or not using enough fasteners, which can result in loose trim over time. It’s also important to ensure corners are cut at the proper angle—typically 45 degrees for inside corners—to create a clean joint. Finally, neglecting to fill in nail holes and caulk seams can leave an unfinished look; always take the time for proper finishing to achieve a polished appearance.
Can I install baseboard trim over existing flooring, or do I need to remove it?
In most cases, you can install baseboard trim over existing flooring; there’s usually no need to remove it unless the flooring is damaged or uneven. However, ensure that the baseboard is installed at the right height to cover any gaps between the wall and the floor. If you’re replacing old baseboards, be sure to remove them carefully to avoid damaging the wall, which may save time in the long run. If you’re unsure, consult a professional to assess the condition of the flooring and provide guidance on the best approach for your specific situation.
What is the best type of molding for home decor projects like baseboard and crown moulding?
For home decor projects, MDF baseboard moulding and crown molding are popular choices due to their affordability and smooth surface, which comes pre-primed and ready to paint. If you want a natural wood look, natural wood or pine wood baseboards are a great option, while PVC baseboard molding offers flexibility and resistance to water damage.
How do I install peel and stick trim molding for a quick home decoration update?
Peel and stick trim molding is an easy way to add style to your home decor. Simply measure and cut the flexible molding trim to the desired length, peel off the adhesive backing, and press it onto the wall or surface. This self-adhesive molding provides a quick, no-mess solution for updating baseboards, wall molding, or wall borders.
What is the difference between baseboard molding and crown moulding?
Baseboard molding is installed at the bottom of the wall where it meets the floor, providing a smooth transition between the wall and the floor. Crown moulding is installed at the top of the wall where it meets the ceiling, adding an elegant touch to the room. Both types of trim come in MDF, PVC, or natural wood materials, depending on the desired look and durability.
Can peel and stick molding trim be used for tile edges or corners?
Yes, peel and stick finish molding trim can be used to cover tile edges or corners for a smooth, finished look. The self-adhesive backing makes it easy to install and is a flexible solution for various surfaces, including tile or walls, offering both decoration and protection from moisture or damage.
What tools do I need to install baseboard moulding in my home?
To install baseboard moulding, you’ll need a miter saw to cut the trim to the correct length, a measuring tape to ensure accuracy, and adhesive or nails to secure the molding to the wall. If you’re using peel and stick baseboard trim, no additional tools are required beyond measuring and cutting to size.