Exploring the world of custom storage options unveils a myriad of possibilities that enhance both functionality and aesthetics within a living space. The journey towards creating practical and stylish furnishings requires an understanding of materials, techniques, and design principles that cater to one’s personal taste and the requirements of the area.
As you delve into this theme, envision the transformation of any corner or area of your dwelling into a perfect balance of utility and style. Mastering the art of constructing these structures not only elevates your craftsmanship but also contributes to a more organized and visually appealing environment.
Whether you seek to create a warm ambiance in your kitchen or a sleek modern look in your living room, knowing the fundamental aspects of design and assembly is crucial. By channeling creativity and attention to detail, anyone can turn an ordinary space into a stunning showcase of personalized elegance.
Choosing the Right Materials for Cabinets
Selecting appropriate materials is a crucial element in the creation of durable and visually appealing storage solutions. The options available can significantly influence the overall look, functionality, and longevity of your designs. Understanding the characteristics of various materials will empower you to make informed decisions that align with your aesthetic preferences and practical needs.
Common Materials to Consider
Numerous substances are typically used in the construction of storage units. Wood remains a popular choice due to its natural beauty and versatility. It can be finished in various styles, from rustic to modern, accommodating a plethora of design themes. Particleboard and MDF (Medium-Density Fiberboard) are cost-effective alternatives, often chosen for their smooth surfaces and ease of fabrication, ideal for painted finishes.
Durability and Maintenance
When choosing materials, it is essential to consider their durability and maintenance requirements. Solid wood, while beautiful, requires regular upkeep to prevent scratches and water damage. Conversely, laminate surfaces are more resilient to wear and tear, making them suitable for high-traffic areas. Ultimately, the decision should reflect the intended use and the level of care you are willing to provide over time.
Essential Tools for DIY Cabinet Building
Creating custom storage solutions involves a range of implements that facilitate precise construction and finish. Knowing which tools are indispensable can significantly enhance the efficiency and quality of your craftsmanship. Below is a list of must-have items that every enthusiast should consider for successful project execution.
-
Measuring Tools:
-
Tape Measure: For accurate length measurements.
-
Square: To ensure corners are perfectly right-angled.
-
Caliper: For more precise dimensions, especially on small parts.
-
Cutting Tools:
-
Table Saw: Ideal for straight cuts on larger panels.
-
Jigsaw: Perfect for curves and intricate designs.
-
Miter Saw: Used for precise angled cuts.
-
Joining Tools:
-
Drill: Essential for making holes for screws and dowels.
-
Screws and Dowels: Various types for sturdy connections.
-
Clamps: To hold pieces together securely while the glue dries.
-
Finishing Tools:
-
Sander: For smoothing surfaces before applying finishes.
-
Brushes and Rollers: To apply paint or varnish evenly.
-
Rags: Useful for wiping away excess stain or dust.
Equipping yourself with these implements will not only simplify your creation process but also elevate the quality of the final product. The right tools make all the difference in achieving the desired results and enjoying the crafting journey.
Step-by-Step Construction Process Explained
Creating a sturdy and functional piece for storing items in your living space can be an enjoyable and rewarding experience. This section provides a comprehensive walkthrough of the entire process, from gathering materials to the finishing touches. Each phase is designed to help you navigate through the craftsmanship smoothly, ensuring a high-quality result.
Gathering Materials and Tools
Before beginning your project, it’s imperative to collect all necessary supplies. Start with quality wood products, such as plywood or solid wood, and ensure you have the correct fasteners, hinges, and hardware. Additionally, having the right tools–like a saw, drill, level, and measuring tape–is crucial for achieving precise cuts and connections. Don’t overlook safety gear, as protecting yourself while working is paramount.
Assembly Steps
Start by cutting your wood to the desired dimensions, making sure to double-check your measurements for accuracy. Assemble the frame first, utilizing strong joints to enhance stability. Once the frame is complete, add the inner shelves or dividers as needed, maintaining even spacing. Finally, finish the construction by attaching the doors, applying finishes, or stains to enhance the appearance and protect the wood.
By following these structured steps methodically, you will not only streamline the creation of your storage solution, but also enjoy the satisfaction that comes from crafting a piece tailored to your space.
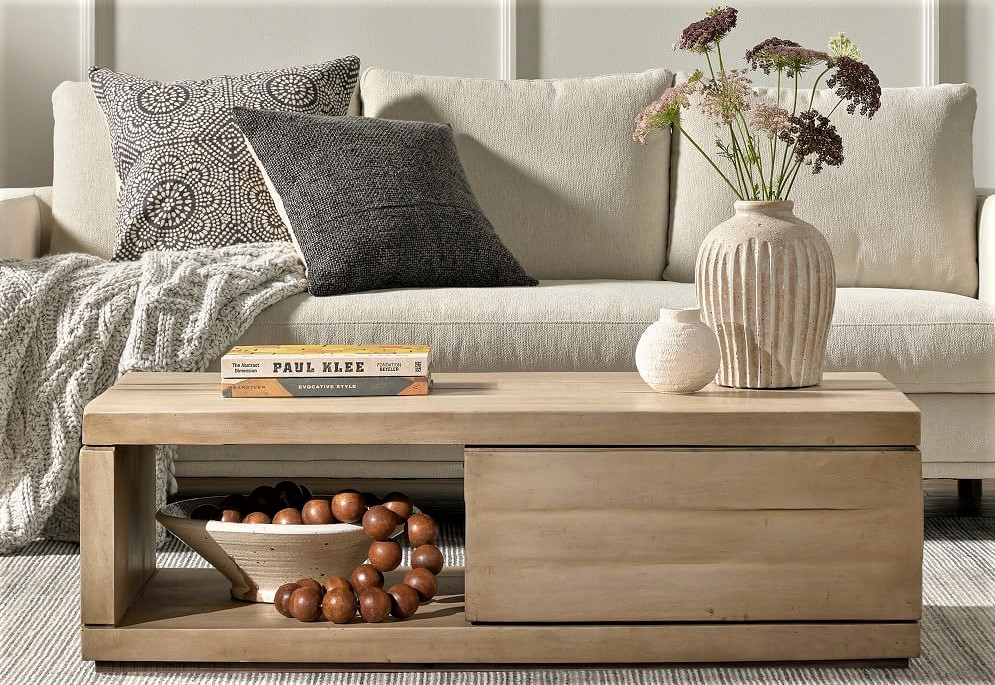
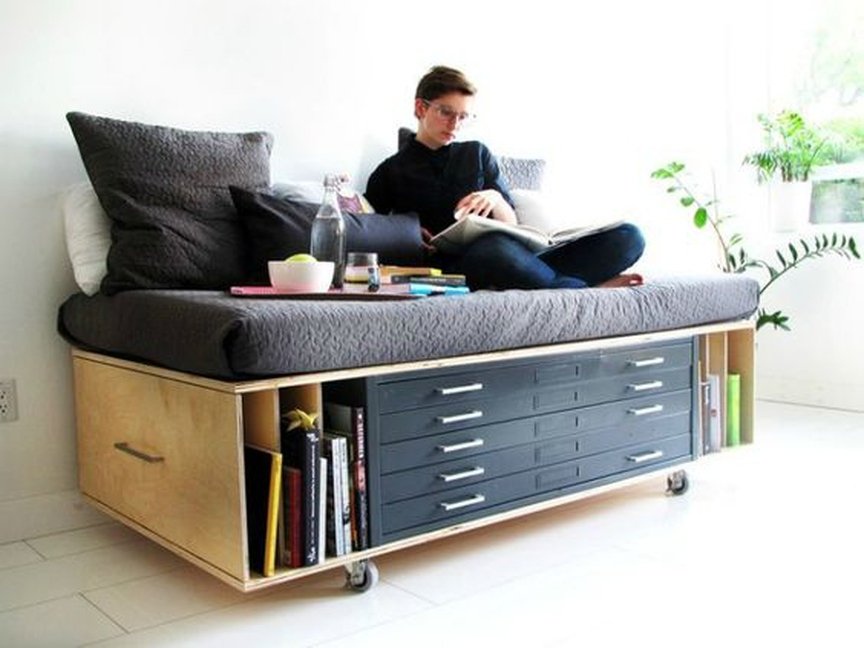
Design Considerations for Optimal Space Usage
When creating functional storage solutions, it is crucial to think thoroughly about how to maximize the available area while ensuring practicality and aesthetics. Thoughtful design choices can significantly enhance the utility of your space, providing efficient storage that blends seamlessly with the overall environment.
Assessing Available Space
Begin by evaluating the dimensions of the room and identifying potential locations for your storage solution. Consider not only the width and height but also the depth. Utilizing vertical space can transform underused areas into practical zones. Shelves, hooks, and cabinets can be installed up to the ceiling, allowing you to store items without sacrificing floor area.
Customization and Functionality
Customization plays a vital role in achieving optimal functionality. Modular designs enable flexibility, allowing you to adjust configurations based on changing needs. Incorporating features such as pull-out drawers, sliding shelves, and hidden compartments can enhance access to items while keeping everything organized. Designing with intention ensures that every inch of space is effectively utilized, making your storage not only efficient but also appealing to the eye.
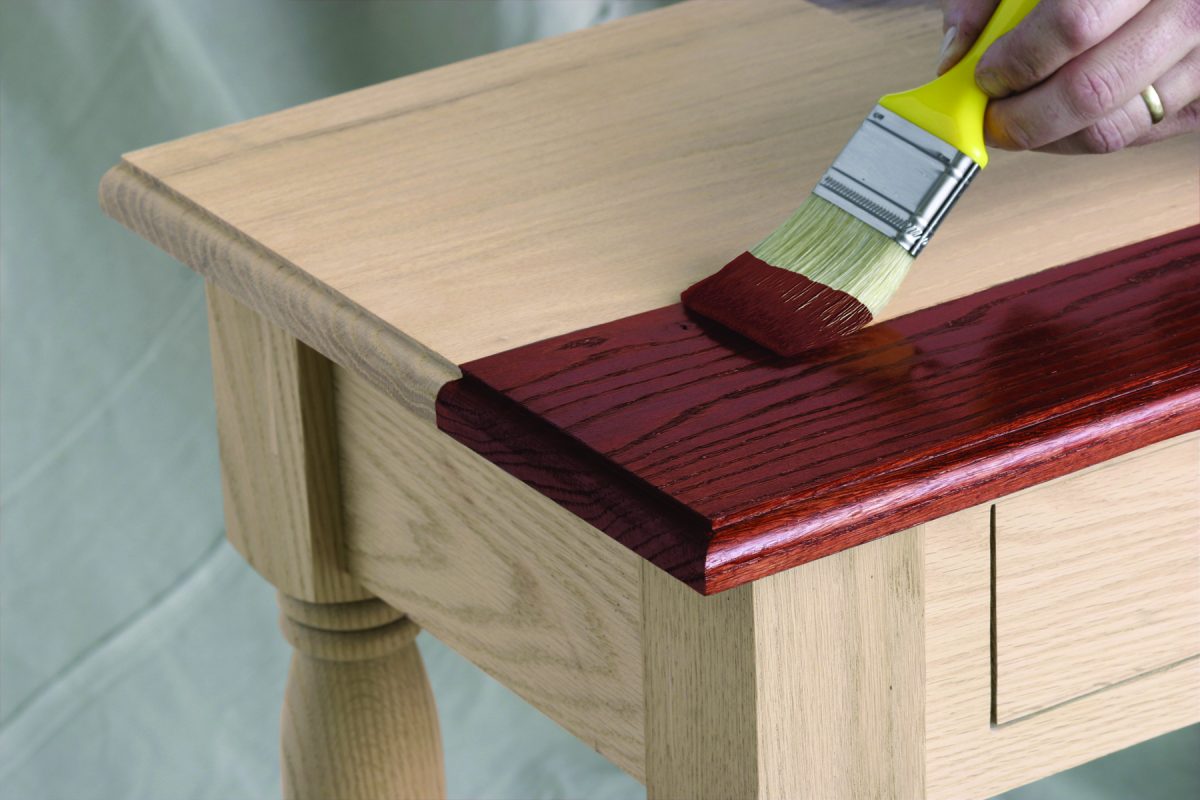
Finishing Techniques for a Professional Look
Achieving a polished appearance in your crafted projects is crucial for elevating their overall aesthetic. The final touches not only enhance the visual appeal but also contribute to durability and functionality. A well-executed finish can transform a simple piece into a masterpiece, making it essential to consider various methods and treatments available.
Choosing the Right Finish
When deciding on a method, consider the materials you have used and the environment where the piece will be placed. Water-based finishes are an excellent choice for interior items, offering quick drying times and low odor, while oil-based finishes provide a rich, warm tone that deepens with age. Each finish brings unique properties, so understanding their effects on your work is crucial for achieving the desired result.
Application Techniques
Applying the finish correctly is just as vital as selecting the right one. Utilize brushes or spray guns for even coverage, ensuring each layer is thin to avoid drips and runs. Allow sufficient drying time between coats, and don’t hesitate to sand lightly between applications for a smooth surface. The effort put into the finishing process will pay off when you see the final presentation of your project, showcasing the care taken in its creation.
Common Mistakes and How to Avoid Them
When embarking on a project to create storage solutions, it’s essential to recognize pitfalls that can lead to frustrating results. Understanding these common errors can save time and resources, ensuring a smoother process and a more satisfactory end product.
-
Improper Measurements: One of the most frequent missteps is failing to take accurate dimensions. This can result in pieces that don’t fit together as intended.
-
Overlooking Material Quality: Choosing subpar materials might save money initially but can lead to durability issues in the long run.
-
Neglecting Design Planning: Diving into construction without a solid plan can lead to confusing layouts and difficult assembly.
-
Inadequate Support Structures: Failing to reinforce the framework can cause instability, especially when weight is added.
-
Ignoring Finishes: Skipping sanding and sealing can result in rough surfaces and poor aesthetics.
To avoid these mistakes, careful preparation is key. Follow these steps:
-
Always double-check measurements and create a detailed sketch before starting.
-
Invest in high-quality materials that will withstand wear and tear.
-
Take the time to develop a comprehensive plan including dimensions and layout.
-
Incorporate proper support mechanisms into your design.
-
Apply appropriate finishes to enhance the appearance and longevity of the pieces.
By being mindful of these potential pitfalls, your project can progress more smoothly, resulting in a successful and attractive outcome.
Q&A: Home furniture building base cabinets
What materials are best for building base cabinets?
When it comes to building base cabinets, the choice of materials is crucial for durability and aesthetics. Commonly used materials include plywood, medium-density fiberboard (MDF), and solid wood. Plywood is favored for its strength and resistance to warping, while MDF offers a smooth finish that is perfect for painting. Solid wood adds a classic touch and can be refinished over time. Ultimately, the best material depends on your budget, desired finish, and the specific use of the cabinets in your home.
How do I design my base cabinets to maximize storage space?
To maximize storage space in your base cabinets, you should first assess your storage needs. Design your cabinets with adjustable shelves, which allow for flexibility in organizing items of different heights. Incorporating pull-out drawers or shelves can also optimize access to items stored at the back. Consider adding specialized storage solutions like pull-out trash bins, spice racks, or dividers for utensils. Additionally, assessing the cabinet height can make a significant difference in accessibility and storage capability, especially in kitchens or utility rooms.
What tools do I need to build my own base cabinets?
Building your own base cabinets requires a variety of tools to ensure precision and ease. Essential tools include a table saw or circular saw for cutting wood, a drill/driver for assembly, a measuring tape for accuracy, and a level to ensure even installation. You may also need clamps to hold pieces together while the glue dries, a sander for a smooth finish, and a jigsaw for any intricate cuts. Safety equipment, such as goggles and gloves, are also important. If you’re new to woodworking, consider starting with a few basic projects to gain confidence with your tools.
How long does it typically take to build and install base cabinets?
The time it takes to build and install base cabinets can vary significantly based on your skill level and the complexity of the design. On average, a skilled DIYer may spend around 1-2 days building the cabinets, which includes cutting, assembly, and finishing. Installation itself may take another day, particularly if the cabinets require adjustments for plumbing or electrical fixtures. If you’re a beginner, expect the entire process to take longer, potentially spanning several days or even weeks as you learn and refine your skills.
Can I build base cabinets for a bathroom instead of a kitchen?
Absolutely! Base cabinets can be effectively built for bathrooms as well. The principles of construction are similar to those for kitchen cabinets; however, it is essential to consider moisture-resistant materials, such as marine-grade plywood or specially treated MDF, to prevent damage from humidity. Moreover, you can customize the design to accommodate sinks and plumbing fixtures. Building bathroom base cabinets can also allow for innovative storage solutions for toiletries, towels, and cleaning supplies while enhancing the overall aesthetic of your bathroom.
How do you build a base cabinet box with a face frame?
To build a base cabinet box with a face frame, you’ll start by cutting your plywood sheets to the desired cabinet dimensions for the sides, back, and bottom. Use pocket hole screws to attach the cabinet sides to the back panel. Once the cabinet box is assembled, you can build the face frame by using pocket holes and a jig like a Kreg jig to connect the frame pieces. Attach the face frame to the front of the cabinet, ensuring it is flush with the sides of the cabinet box.
What is the purpose of a toe kick in base cabinets?
A toe kick is the recessed area at the bottom of a base cabinet that allows space for your feet while working at a counter. It provides comfort when standing close to the cabinet for long periods, like when cooking. If you build a base cabinet without a toe kick, it might make standing at the counter less ergonomic. When building base cabinets, it’s important to consider including a toe kick to ensure both functionality and comfort.
Can you build frameless cabinets without using a face frame?
Yes, you can build frameless cabinets without using a face frame. Frameless cabinets are typically constructed from ¾″ plywood sheets for the cabinet sides, top, and bottom. They rely on thicker materials for strength and use edge banding to finish the front edges. Pocket holes and screws can be used to assemble the cabinet box, and cabinet doors or drawer fronts are attached directly to the inside of the cabinet for a sleek, modern look.
What type of plywood should be used to build cabinet boxes?
For building cabinet boxes, ¾″ plywood is commonly used because it provides the necessary strength and durability for kitchen cabinets. One ¾″ sheet of plywood will make about two cabinet sides, depending on the cabinet size. Plywood is preferred over particle board or MDF for its stability, and it can be easily cut to size for the cabinet sides, back panel, and bottom.
How do you secure base cabinets to the wall?
To secure base cabinets to the wall, first, position the cabinet in place and check that it is level. Then, use 1 ¼″ pocket hole screws to attach the cabinet back to the wall studs. Make sure to secure it to the wall framing by drilling through the back panel of the cabinet into the studs. If you’re installing multiple cabinets, secure them together by attaching the sides of the cabinets with pocket holes.