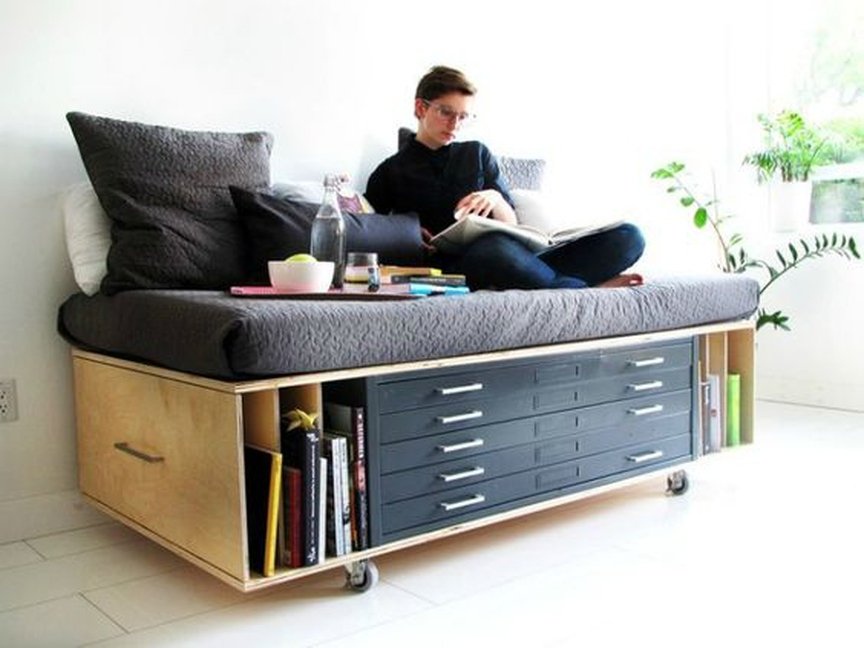
Finding innovative ways to maximize space in our living environments is a challenge many face. The desire to incorporate clever storage options that are not only functional but also aesthetically pleasing drives individuals to explore creative solutions. This approach allows for the seamless integration of practical features, enhancing the overall design without compromising style.
In this exploration, we will delve into the art of constructing a concealed compartment that serves a dual purpose. Not only does it provide ample room for stashing away items, but it also adds a unique touch to the atmosphere of the area. With the right techniques and materials at your disposal, transforming an ordinary piece into a smart storage solution is within your grasp.
Whether you are a seasoned creator or a novice looking to embark on a new project, the process can be straightforward and rewarding. This journey invites you to engage your creativity while improving organization in your living space. Get ready to uncover the potential that lies within your surroundings and enhance the functionality of your beloved interiors.
Understanding Access Panel Boxes
An essential component in modern residential construction, these structures serve as unobtrusive portals to critical spaces that require maintenance or inspection. They offer convenient access to hidden utilities, ensuring that essential systems can be reached without extensive alterations to the surrounding architecture.
Key Benefits
Installing such openings can significantly enhance both functionality and aesthetics within a living space. Convenience is a primary advantage–by allowing easy entry to plumbing, electrical wiring, or HVAC systems, homeowners can simplify maintenance tasks. Additionally, the design can seamlessly blend with existing decor, ensuring that practicality does not come at the expense of style.
Considerations for Installation
When planning to incorporate these features, several factors deserve attention. Placement is crucial; choosing a suitable location for easy access while minimizing visibility is important. Furthermore, selecting the right materials and sizes will impact both usability and integration within the existing space. Assessing these elements ensures a successful and efficient installation process.
Essential Tools for Your Project
Having the right equipment is crucial when embarking on any creative endeavor aimed at enhancing your living space. Proper tools not only make tasks easier but also ensure better results, allowing you to achieve your vision seamlessly. Understanding which items are necessary can save time and effort, leading to a more enjoyable and efficient process.
First and foremost, you will need a sturdy measuring tape to guarantee precision in your dimensions. A reliable level is equally important to ensure that everything aligns correctly, providing a professional finish. Additionally, a quality saw–be it a hand saw or a power saw–will facilitate smooth cutting, while a drill will assist in joining materials securely.
Don’t overlook the necessity of a competent set of screwdrivers. A versatile toolkit with handles of various sizes will ensure you can tackle any fastening task. Furthermore, a pair of pliers can be invaluable for gripping and twisting, making adjustments easier as you progress.
Lastly, safety equipment such as goggles and gloves should not be forgotten. Protecting yourself while you work is essential to avoid any accidents and make the experience as enjoyable as possible. With these fundamental tools in your arsenal, you’ll be well-prepared to create something truly remarkable.
Materials Needed for Construction
Creating a functional and aesthetically pleasing structure requires careful selection of various elements. The right components not only ensure durability but also enhance the overall appearance of the finished item.
Essential Components
To start the project, you’ll need the following foundational materials:
-
Plywood or MDF: These are excellent choices for the main structure due to their strength and versatility.
-
Wood Screws: Necessary for securely fastening components together.
-
Wood Glue: Provides additional stability and support at the joints.
-
Hinges: Important for allowing easy access and movement.
Finishing Touches
To achieve a polished look, consider these finishing materials:
-
Sandpaper: Essential for smoothing rough edges and surfaces.
-
Paint or Stain: Allows for customization of color and finish, blending seamlessly with your space.
-
Touch-Up Paint: This is useful for making final adjustments and correcting any imperfections.
By gathering these items beforehand, you pave the way for a smooth and efficient creation process.
Step-by-Step Installation Process
In this section, we will outline a series of methodical actions to successfully integrate an access point into your design. Following these instructions will ensure a seamless and functional setup that enhances both practicality and aesthetics.
-
Gather Your Materials: Before beginning, ensure you have all necessary tools and components readily available. This may include:
-
Measuring tape
-
Drill
-
Screws
-
Material for the opening
-
Hinges (if required)
-
Finish trim or molding
-
Measurement and Marking: Carefully measure the desired location for the opening. Use a pencil to mark the dimensions on the surface, ensuring alignment with surrounding elements.
-
Cutting the Opening: Use the appropriate cutting tool to create the access area based on your markings. Take your time to ensure clean edges and accurate sizing.
-
Install Hinges: If your design includes a door, now is the time to attach the hinges. Secure them firmly to one side of the newly created opening.
-
Attach the Cover: Position the cover or door in place. Make sure it aligns properly with the edges and operates smoothly, then secure it as necessary.
-
Finishing Touches: Complete the look by adding trim around the edges if desired. This enhances the overall appearance and can match or complement existing decor.
By adhering to these outlined steps, the integration will not only meet functional needs but also contribute to the overall harmony of the space.
Finishing Touches for a Professional Look
Achieving a polished appearance requires attention to detail and thoughtful enhancements that elevate your project. These final elements can transform an ordinary creation into something that exudes quality and craftsmanship. From clean lines to seamless integration, focusing on these aspects will make a significant difference in the overall aesthetic.
Selecting the Right Hardware
The choice of hardware is crucial in elevating the final presentation. Opting for high-quality hinges, latches, and knobs adds not only functionality but also visual appeal. Consider finishes that complement your overall design – whether sleek metal, warm wood, or a modern matte coating.
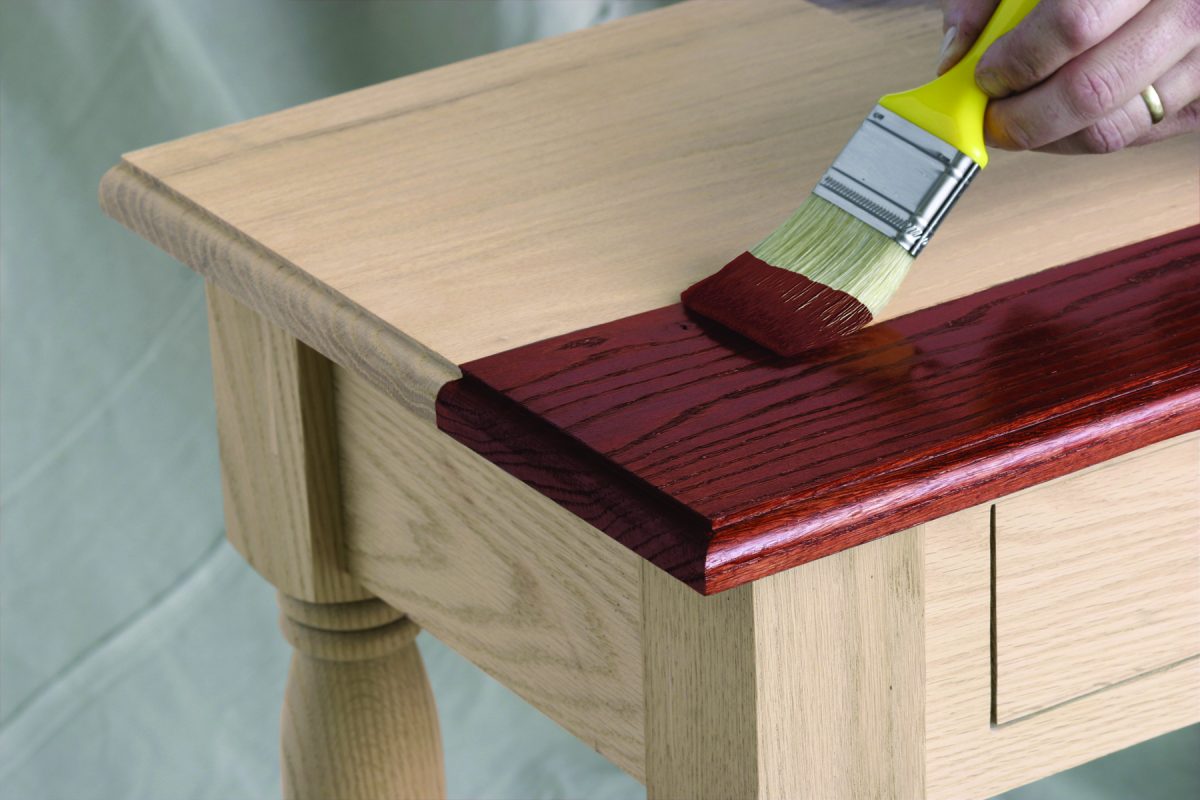
Applying finishing techniques can enhance texture and durability. Sanding surfaces to a smooth touch, followed by paint or stain application, ensures a refined look. Moreover, sealants provide protection, allowing your work to withstand daily use while maintaining its aesthetic charm.
|
Technique |
Description |
|---|---|
|
Sanding |
Smoothens surfaces and prepares them for finishing. |
|
Staining |
Adds color while highlighting natural wood grain. |
|
Sealing |
Protects the surface from wear and tear. |
Maintaining Your Access Panel Box
Ensuring the longevity and functionality of your concealed entrance is essential for seamless operation and aesthetic appeal. Regular upkeep can prevent potential issues, allowing for easy access to underlying structures while maintaining the integrity of your surroundings.
First and foremost, cleaning should be a routine that you incorporate into your maintenance schedule. Dust, debris, and grime can accumulate over time, potentially leading to malfunctions. Use a soft, damp cloth to wipe down the surface and remove any particles that may interfere with its function.
Next, pay attention to the hinges and fasteners. They are crucial for ensuring smooth operation and should be periodically inspected. If you notice any signs of rust or wear, apply a suitable lubricant to prevent stiffness and maintain ease of use.
Additionally, regularly check the seals around the entrance. Proper sealing prevents dust and moisture from infiltrating, which can cause damage over time. If you find any deterioration, consider replacing them promptly to uphold the protective qualities of your installation.
Lastly, make sure to monitor the overall condition of the structure. Look out for any signs of warping, cracks, or other forms of damage that could compromise the installation. Addressing these issues promptly will extend the life of your feature and maintain its visual appeal.
Q&A: Home furniture DIY access panel box
What materials do I need to create a DIY access panel box for my furniture?
To create a DIY access panel box, you will need several materials. Primarily, you’ll need plywood or MDF board for the structure of the access panel. Additionally, you will require hinges for easy opening and closing, wood screws to secure the panel in place, and a handle for easy access. Don’t forget about measuring tape, a saw for cutting the wood, a drill for making holes, and sandpaper for smoothing any rough edges. You might also consider paint or stains to finish the panel to match your furniture.
Can I customize the size of the access panel box for my specific furniture piece?
Absolutely! The beauty of a DIY project is that you can customize the size of the access panel box to fit your specific furniture. Carefully measure the area where you plan to install the access panel and determine the dimensions based on your needs. Use these measurements when cutting your wood pieces. Just make sure the panel is large enough to allow easy access to the storage or cables you plan to conceal, but not so large that it compromises the structural integrity of your furniture.
Are there any safety precautions I should take while building the access panel box?
Yes, safety is crucial when working on DIY projects. First, always wear safety goggles to protect your eyes from dust or debris while cutting wood. If you are using power tools, such as a saw or a drill, make sure you read the user manual and follow all safety guidelines. Keep your workspace clean and organized to prevent any accidents. Additionally, use gloves when handling raw materials, especially if they have sharp edges. Lastly, ensure you have a well-ventilated area if you’re using paint or stain to avoid inhaling harmful fumes.
What tools are required to build an access panel box?
To build an access panel box, you will need several essential tools. A measuring tape is critical for accuracy in measurements. You will need a circular saw or hand saw for cutting your wood to size. A drill with the appropriate drill bits is necessary for making holes for screws and attaching hardware. Screwdrivers will be needed for tightening screws and securing the hinges and handles. Sandpaper is important for finishing edges and surfaces, while a square can help ensure your cuts are straight and that the panel fits properly. Additionally, a level will help make sure everything is aligned correctly during installation.
How can I ensure that the access panel box looks aesthetically pleasing?
To ensure your access panel box is aesthetically pleasing, you can take several steps. First, choose materials that match or complement your existing furniture. Once you have cut the panel and assembled it, consider applying a coat of paint or stain that matches your furniture’s color scheme. You can also add decorative touches like trim around the edges or a stylish handle that fits the decor of the room. Sanding down sharp edges and creating a smooth finish will enhance the overall look. Finally, position the access panel in a way that it is functional but minimally intrusive to the furniture’s design.
What materials do I need to create a DIY access panel box for home furniture?
To create a DIY access panel box, you will need the following materials: plywood or MDF board for the box structure, hinges to allow the panel to open and close, screws for assembly, a saw (either a hand saw or a power saw), a drill for the screws, sandpaper to smooth any rough edges, and paint or stain to match your furniture. You may also want a measuring tape and a square for accurate cuts. Don’t forget safety gear, like goggles and a dust mask, when working with power tools!
What is the best access door for drywall installation?
The best access door for drywall installation typically depends on your needs, but many recommend a plastic access panel or a metal access panel for durability and ease of installation. Plastic access panels are lightweight and easy to install, while metal access panels provide more durability and a sleek finish. You can find both options, including hinged door panels and flush access panels, at home improvement stores like Lowe’s.
How do I install a drywall access panel to provide access to electrical panels?
To install a drywall access panel for electrical panels, first measure and cut an opening in the drywall. Then, fit the drywall access panel into the opening, ensuring a snug fit. Plastic access panels are often easier to install, while metal access panels provide added security. Most panels, including those designed for ceiling access or wall access, come with a flush mount to blend with the wall color. Installation is straightforward and provides quick access to electrical panels.
What should I look for in an access door for a commercial building?
When selecting an access door for a commercial building, consider durability, security, and ease of use. Steel access panels or metal access panels are the best access doors for commercial applications because they offer a high level of security and can withstand heavy use. Access doors and panels should also provide easy access to electrical systems, plumbing, or security system controls behind walls. For ceiling access, look for access panels that are reinforced and provide a secure fit.
Can I use a plastic access panel for drywall access in the ceiling?
Yes, a plastic access panel can be used for drywall ceiling access. Plastic access panels are lightweight, easy to install, and durable enough for ceiling applications. They provide easy access to plumbing, electrical systems, or sprinkler controls. A flush access panel with a durable white finish will blend seamlessly with the ceiling. For added security and durability, you can also consider using a metal access panel, especially for commercial spaces.
Where can I find access panels at Lowe’s for home improvement projects?
Access panels for home improvement projects can be found at Lowe’s, where availability may vary depending on location. You can shop access panels for drywall, ceilings, or walls, including plastic access panels, metal access panels, and hinged door panels. Lowe’s offers a wide range of options, including panels for both residential and commercial applications, and you can also request a quote or check local hardware stores for availability.