Enhancing the aesthetic appeal of interiors often leads to a desire for innovative approaches that breathe new life into beloved possessions. Creative endeavors involving color and texture can turn everyday items into stunning focal points, reflecting personal style and taste. This exploration invites individuals to embrace the art of applying transformative changes to their furnishings through simple yet effective methods.
Harnessing the power of creativity opens the door to a world where imagination meets practicality. By engaging in hands-on projects, enthusiasts can not only upgrade their surroundings but also express their individuality. Different applications and finishes can elevate even the most mundane pieces, allowing for a unique signature that resonates throughout the space.
The journey into this realm of artistic enhancement offers opportunities for both novice and seasoned creators. With a blend of inspiration and technique, it becomes possible to achieve remarkable results that leave a lasting impression. Embrace this chance to invigorate your surroundings, making them a true reflection of personal flair and vision.
Choosing the Right Paint for Furniture
Selecting the appropriate coating can greatly influence the aesthetics and longevity of your interior pieces. Different materials and finishes require unique formulations to achieve the desired results and ensure durability over time. Understanding the types of finishes available can aid in making an informed decision that aligns with your vision.
When considering what kind of coating to use, three main factors should guide your selection: the surface material, the intended use, and the overall aesthetic you wish to create. Each type of paint has its unique properties, making it suitable for specific applications.
|
Type of Paint |
Best For |
Finish |
|---|---|---|
|
Latex |
Wood, MDF |
Matte, Satin |
|
Chalk |
Wood, Metal |
Soft, Vintage Look |
|
Acrylic |
Wood, Plastic |
Glossy, Smooth |
|
Oil-based |
Wood, High-traffic items |
Glossy, Hard finish |
|
Spray |
Small items, intricate details |
Varies |
Ultimately, selecting the proper paint not only enhances visual appeal but also contributes to the longevity and resilience of the pieces. A thoughtful approach will ensure that the end result meets both functional and aesthetic needs.
Essential Tools for DIY Painting Projects
Embarking on a creative journey requires a well-thought-out selection of instruments that will enhance the overall experience and yield impressive results. Having the right equipment at hand can make a significant difference in achieving a professional finish. This section provides insights into must-have items for successful endeavors in the world of surface refurbishment.
Basic Equipment
To kick off any project, certain fundamental tools are indispensable. Brushes come in various shapes and sizes, making them versatile for different areas and styles. Rollers offer a quick way to cover larger surfaces efficiently. Additionally, a drop cloth is essential to protect the surrounding environment from accidental spills and splatters, ensuring a tidy workspace.
Preparation and Finishing Tools
Preparation is key to achieving lasting outcomes. Sandpaper or a sanding block will help smooth surfaces, removing any imperfections. Finishing tools, such as a high-quality sealer or topcoat, are crucial for providing durability and an attractive sheen. Assembling these items in advance ensures an organized approach, allowing creativity to shine through without disruptions.
Techniques for Preparing Face Frames
Essential steps ensure a successful project outcome. Proper groundwork is vital to achieving a flawless finish. This phase involves meticulous attention to detail, allowing subsequent applications to adhere and display beautifully.
Cleaning surfaces removes dust, grease, and impurities. Using a mild detergent solution can effectively eliminate residues that may hinder adhesion. Allow the frames to dry completely before moving on.
Sanding plays a crucial role in this process. Employing fine-grit sandpaper creates a smooth texture while enhancing the bond between layers. Be thorough, ensuring all areas are evenly addressed, and don’t forget to wipe off dust afterward.
Priming serves as a fundamental step. Selecting the right primer improves durability and color vibrancy. Apply a thin layer evenly and allow it to cure as recommended by the manufacturer. This preparation enhances the overall aesthetics of the frame.
Inspecting the frames after each preparation step is important. Look for any imperfections or inconsistencies that might require additional attention. Making necessary adjustments at this stage will prove beneficial in the final results.
Color Trends to Consider in 2023
This year brings an exciting palette that reflects current moods, lifestyles, and environmental concerns. Embracing various hues can reinvigorate spaces, providing warmth and serenity or boldness and energy. It’s essential to explore these emerging shades to create inviting aesthetics that resonate with contemporary tastes.
|
Color |
Description |
|---|---|
|
Earthy Tones |
Rich browns, terracotta, and muted greens echo nature, promoting a sense of tranquility and grounding. |
|
Pastel Shades |
Soft pinks, blues, and lavenders provide a gentle touch, creating calming and serene environments. |
|
Bold Jewel Tones |
Deep, vibrant colors like emerald green and sapphire blue inject energy and sophistication into any setting. |
|
Neutral Grays |
Timeless and versatile, various shades of gray offer an elegant backdrop, allowing other colors to shine. |
|
Warm Whites |
Soft whites with warm undertones create a welcoming ambiance while enhancing natural light. |
Cultivating an understanding of these hues can elevate any atmosphere. Experimenting with combinations from this year’s selections can yield dynamic and personalized outcomes that reflect individual style.
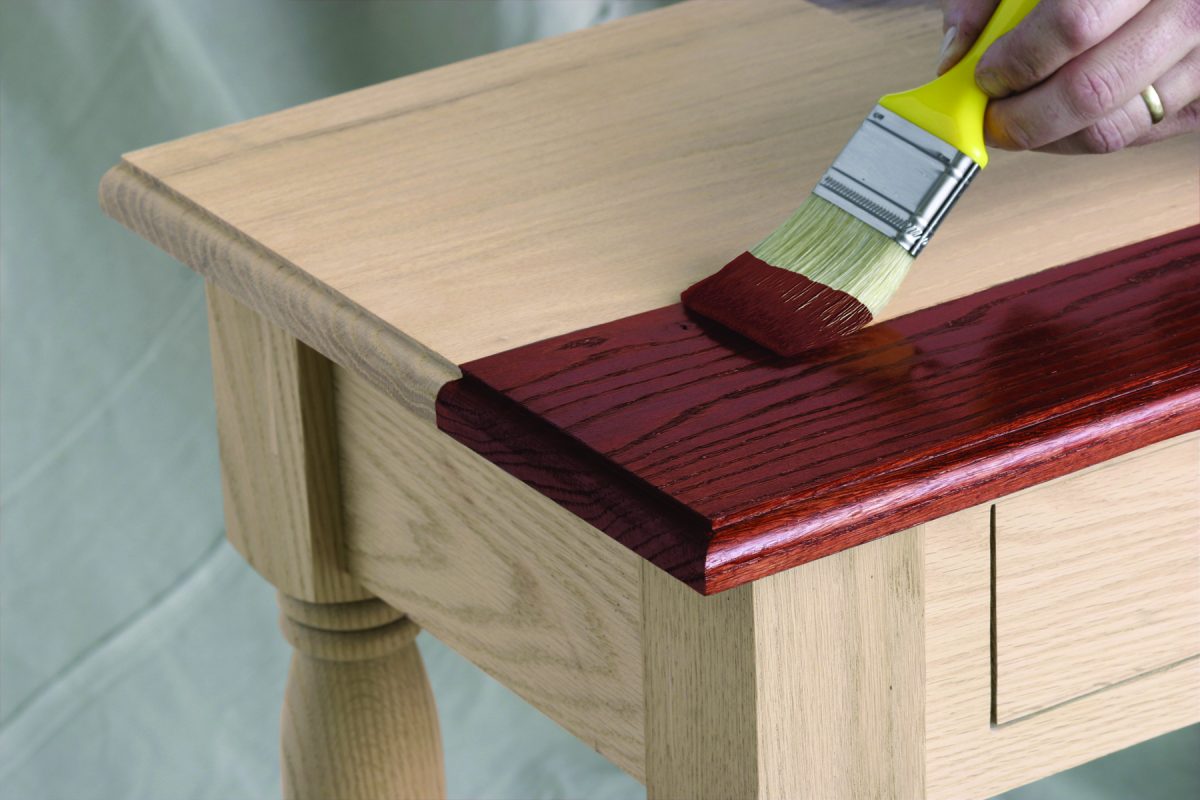
Finishing Touches: Sealing Your Work
Completing a project requires careful attention to the final stages. One of the key aspects is ensuring longevity and protection for the surfaces you’ve meticulously worked on. This final layer not only enhances the appearance but also offers defense against wear and environmental factors.
Various options are available to achieve an ideal finish. Here are some popular choices:
-
Polyurethane: Provides a robust layer ideal for surfaces that endure heavy use.
-
Wax: Offers a soft sheen and is easy to apply, perfect for a more natural look.
-
Varnish: Known for its durability, it provides a waterproof finish ideal for kitchens or bathrooms.
-
Shellac: A traditional choice that dries quickly and gives an elegant finish but requires careful handling.
Each option has its unique characteristics and application methods. Before proceeding, consider the following steps:
-
Ensure the surface is clean, smooth, and free of dust or debris.
-
Test your chosen sealing product on a small, inconspicuous area to observe the result.
-
Apply the sealant evenly using a brush or cloth, following the manufacturer’s guidelines.
-
Allow sufficient drying time between coats if applying multiple layers for enhanced protection.
-
Inspect the finish after completion; additional coats may be necessary for desired durability.
By taking these final steps, you’ll ensure that your hard work is not only visually appealing but also well-protected against the test of time.
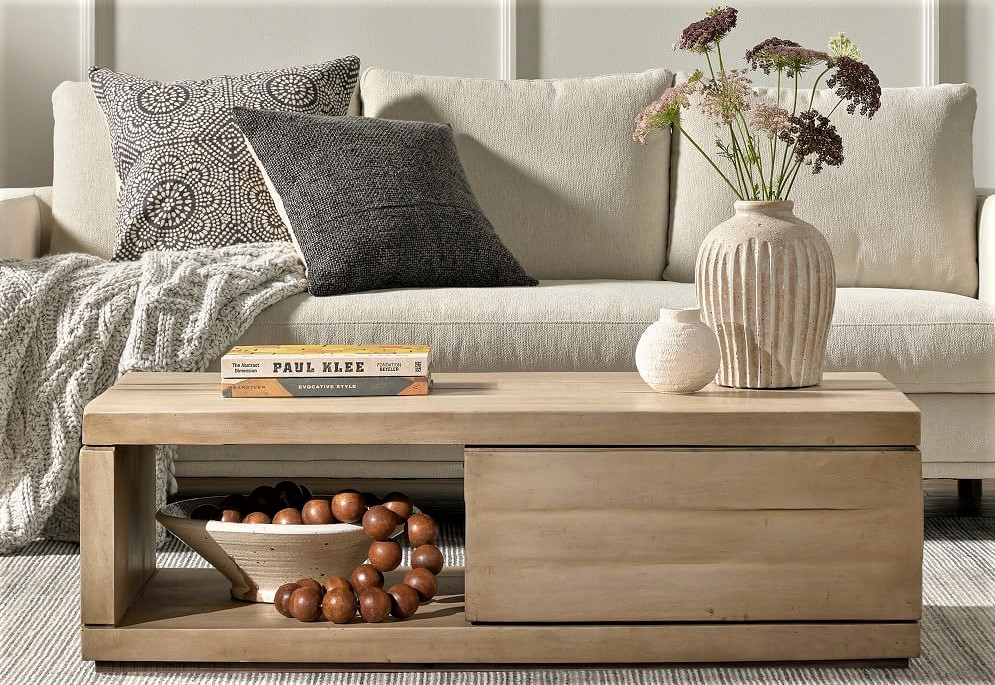
Inspiration from Successful Furniture Makeovers
Exploring the world of revitalized pieces can spark creativity and ambition in anyone looking to undertake a similar endeavor. By observing remarkable transformations, individuals can glean valuable ideas and techniques that breathe new life into ordinary items. This section delves into a variety of successful projects, showcasing diverse styles and approaches to reimagining classic designs.
Stunning Color Choices
Vibrant hues can completely change the perception of a formerly dull object. Savvy creators often opt for bold and unexpected shades to make a statement. A meticulous selection of colors not only enhances aesthetics but also allows for personal expression within any space. These choices breathe individuality into the makeover process, making each piece a reflection of its owner.
Unique Textures and Finishes
In addition to color, textures play an integral role in the charm of revitalized creations. Combining different finishes–such as matte, glossy, or distressed–adds depth and interest. Projects that explore various tactile elements often stand out, captivating onlookers with their thoughtful design. By examining successful examples, one can easily gather ideas to make their next project extraordinary.
Q&A: Home furniture painting face frames
What are face frames, and why should I consider painting them?
Face frames are the visible frames on the front of cabinets and furniture that provide structure and support for doors and drawers. Painting face frames can be a cost-effective way to refresh the look of your furniture without having to replace it entirely. By utilizing DIY furniture painting techniques, you can customize the color and finish to match your decor, making your space feel more cohesive and inviting.
How can I prep my face frames for painting to ensure a smooth finish?
Prepping your face frames is crucial for achieving a smooth and lasting finish. Start by removing any hardware such as knobs and hinges. Clean the surfaces thoroughly with a degreaser to remove dust and oils. Next, lightly sand the surface with 120-grit sandpaper to create a key for the primer and paint to adhere to, followed by a finer 220-grit sandpaper for a smoother touch. After sanding, wipe down the surfaces with a damp cloth to remove dust, and let them dry completely before applying primer. This process will help prevent peeling and ensure that your paint goes on evenly.
How do I maintain my painted face frames after the project is completed?
Maintaining your painted face frames is essential to ensure they look good for years to come. Begin by cleaning them regularly with a soft, damp cloth to remove dust and grime—avoid harsh chemicals that could damage the paint. If you notice any scratches or chips, touch them up as soon as possible to prevent further damage. Additionally, ensure that heavy items are not placed on the painted surfaces to avoid wear and tear. Lastly, consider applying a fresh coat of topcoat every couple of years to protect the finish and maintain vibrancy.
What are some essential tips for preparing furniture for painting?
When preparing furniture for painting, it’s vital to start with a thorough cleaning to remove dust, grease, and any old finishes. Sanding the surface is also crucial; it helps the new paint adhere better and creates a smooth finish. Using a primer is recommended, especially for surfaces that are dark or glossy, as it creates a barrier that ensures even color and reduces the number of paint coats needed. Remember to remove hardware like knobs and hinges, and if the furniture has any intricate details, consider using a small brush or foam applicator for those areas. Finally, always work in a well-ventilated area to ensure safety and improve drying times.
What type of hardwood is best for building a cabinet door if you’re planning to paint it?
If you’re planning to paint your cabinet door, poplar is a great choice of hardwood. It’s a paint-grade wood, meaning it takes paint well and has a smooth, even surface. This makes it an ideal option for kitchen cabinets when you’re going to paint them. While poplar is not as hard as some other hardwoods, it is cost-effective and easy to work with, especially for face frame cabinet building.
How do you build and assemble a face frame for a kitchen cabinet to ensure it is flush with the cabinet sides?
To build a face frame for a kitchen cabinet, start by cutting stiles and rails to the correct measurements. Assemble the face frame using pocket screws to join the stiles and rails. Clamp the pieces securely to ensure they stay in place while you drive in the screws. After assembling, make sure the face frame is flush with the cabinet sides, as furniture looks best when they’re flush with the cabinet sides. Once assembled, you’re ready to sand the face frame to prepare it for finishing.
What woodworking tips can help ensure the face frame parts fit together seamlessly?
One important tip for woodworking when building face frames is to label all the pieces with a pencil to ensure they go back together in the same way they were cut. This helps in aligning the grain color and avoiding stark grain color variations at joints. Using a flush trim router bit can help exactly replicate previous cuts, ensuring the width and thickness of all parts are exactly the same. Additionally, being sparing with brads when attaching parts can help in achieving a clean finish.
How do you install a kitchen cabinet face frame using clamps and construction adhesive?
To install a kitchen cabinet face frame, apply construction adhesive to the edges of the cabinet box. Place the face frame on the cabinet and use clamps to hold it in place. Make sure to align the face frame with the cabinet sides to ensure they are flush. Allow the adhesive to set before removing the clamps. You can also use pocket hole screws to secure the face frame while the adhesive dries for added strength. This technique ensures that the face frame stays securely attached without gaps.
What are the benefits of leaving off the back of the cabinet until the face frame is applied?
Leaving off the back of the cabinet until the face frame is applied provides easier access for clamping and attaching the face frame. This allows you to nail the face frame in place without obstruction, making the assembly process more efficient. Additionally, it is easier to align the parts accurately, ensuring the face frame is flush with the cabinet sides. Once the face frame is secure, the back panel can then be added to complete the cabinet. This approach can save time and make the process of building cabinets more straightforward.