Transforming your living environment can be an exciting journey filled with creativity and style. By focusing on specific elements, you can breathe new life into various aspects of your surroundings, adding character and warmth. A strategic approach to refining these components can make a significant difference in the overall ambiance of your dwelling.
The process of refreshing and beautifying these features involves careful consideration and execution. Selecting the right materials, colors, and techniques enables you to achieve a personalized touch that reflects your unique taste. Whether you lean towards classic charm or modern sleekness, the method you choose plays a crucial role in the final aesthetic.
As you embark on this endeavor, it’s essential to equip yourself with knowledge and practice. Understanding the nuances of application and preparation can elevate even the simplest project. With a bit of effort and attention to detail, you can create a captivating visual impact that leaves a lasting impression on anyone who enters your space.
Choosing the Right Stain for Your Doors
Selecting the perfect hue to enhance your entryways can significantly influence the overall appeal of your living space. The right shade not only complements your decor but also highlights the natural beauty of the wood. Understanding the various options available helps you make an informed choice that aligns with your aesthetic vision.
When considering a finish, evaluate the type of wood you’re working with, as different varieties absorb color differently. Rich grains and textures can be accentuated with darker tones, whereas lighter woods often benefit from more transparent shades that allow the natural patterns to shine through. Additionally, think about the ambiance you wish to create; warm tones can evoke a cozy feel, while cooler shades may add a modern touch.
It’s also important to take into account the durability of the product you choose. Some finishes are specifically formulated to withstand wear and tear better than others, making them ideal for high-traffic areas. Investigate options that offer UV protection to maintain the color integrity over time, as sunlight can cause fading.
Finally, don’t forget to test samples on a small area or a scrap piece of wood before committing to a full application. This will allow you to see how the stain looks in different lighting and to ensure it aligns with your expectations. Taking these factors into account will guide you to a selection that not only beautifies but also stands the test of time.
Essential Tools for Staining Process
Embarking on a project to enhance the look of your surfaces requires several key implements that ensure a seamless and professional finish. Gathering the right equipment is crucial to achieving the desired appearance while also safeguarding the integrity of the materials involved.
|
Tool |
Purpose |
|---|---|
|
Quality Brush |
For even application of color, providing precision and control. |
|
Foam Pad |
Ideal for applying and blending finishes, reducing streaks. |
|
Rags |
Used for wiping off excess liquid and polishing surfaces. |
|
Sandpaper |
Essential for prepping surfaces to ensure optimal adhesion. |
|
Masking Tape |
To protect areas from unwanted coloration during the application. |
|
Drop Cloth |
To safeguard floors and adjacent areas from spills and stains. |
|
Gloves |
To protect hands from chemicals and prevent skin irritation. |
Utilizing these items will greatly enhance the outcome of your project, leading to an impressive transformation that highlights the beauty of the chosen material.
Preparing Your Doors for Staining
Before diving into the transformation process, it’s crucial to set the stage properly. A well-prepared surface ensures an even application and enhances the final result, making the outcome truly eye-catching. This stage involves several key steps that will lay the foundation for a successful enhancement of your surfaces.
-
Remove Hardware: Start by detaching all knobs, handles, and locks. This will prevent any stains from affecting these elements and allow for easier access to the entire area.
-
Clean the Surface: Use a soft cloth or sponge with a mild detergent to remove any dirt, grime, or oils. A clean surface is vital for better absorption of pigments.
-
Sand the Surface: Lightly sand the area using fine-grit sandpaper. This step helps in creating a smooth texture and opens up the pores, allowing the color to penetrate effectively.
-
Remove Dust: After sanding, thoroughly clean the surface again to eliminate any dust particles. A vacuum or a tack cloth works well for this purpose.
-
Assess the Surface: Inspect for any dents or imperfections. Fill in any flaws with wood filler and sand again to achieve a seamless look.
By following these essential preparations, you will ensure a flawless application that showcases the beauty of your surfaces. This foundation is key to achieving a remarkable finish that will elevate your living space.
Step-by-Step Staining Instructions
Transforming surfaces can be a rewarding process that not only enhances their look but also protects them. This guide will walk you through the essential steps to achieve a beautifully finished product that complements your style.
-
Gather Your Materials:
-
Stain of your choice
-
Brushes or rags
-
Sandpaper
-
Clean cloths
-
Protective gloves
-
Drop cloths or plastic sheets
-
Prepare the Area:
-
Choose a well-ventilated space to work.
-
Lay down drop cloths to protect the floor and surrounding surfaces.
-
Surface Preparation:
-
Start by cleaning the surface thoroughly to remove any dust or debris.
-
Sand the area to ensure a smooth finish, starting with medium-grit sandpaper followed by fine-grit.
-
Wipe away dust with a clean cloth.
-
Apply the Stain:
-
Stir the stain well before use to ensure an even consistency.
-
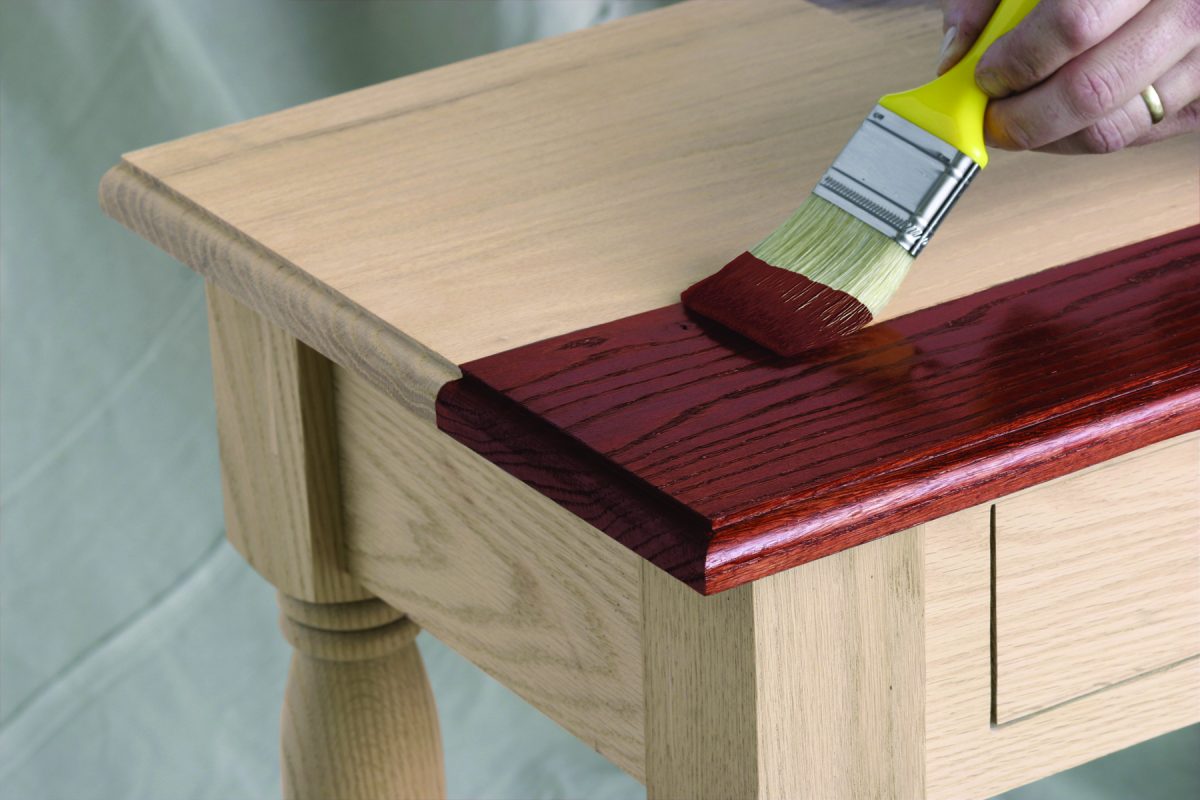
Using a brush or rag, apply the stain in the direction of the grain, working in small sections.
-
Allow the stain to penetrate for the manufacturer’s recommended time before wiping away excess for a more uniform appearance.
-
Drying Time:
-
Let the surface dry completely according to the product instructions.
-
Consider applying additional coats for a deeper hue, following the same application process.
-
Final Touches:
-
Once dry, evaluate the finish and sand lightly if necessary to achieve a smooth surface.
-
Apply a protective topcoat for added durability and gloss.
-
Allow the topcoat to cure as recommended before use.
By following these straightforward steps, you can successfully rejuvenate surfaces, imbuing them with character and charm while ensuring they remain protected for years to come.
Tips for Achieving a Smooth Finish
Creating a flawless appearance on your surfaces requires attention to detail and the right techniques. Whether you’re updating an old piece or working on a fresh project, mastering the art of achieving a smooth result is essential for an aesthetically pleasing outcome. This section will guide you through effective strategies to enhance the overall quality of your finish.
Preparation is Key: Start with thorough preparation of your surfaces. Ensure that they are clean, dry, and free from any previous coatings or imperfections. Sanding the surface gently with fine-grit sandpaper can help eliminate rough spots and create a better foundation for a silky smooth finish.
Choose the Right Tools: Selecting appropriate brushes, applicators, or rollers can make a significant difference. High-quality tools designed for the material you are working with will provide better control and a more even application, reducing streaks and roller marks.
Apply Even Coats: For an impeccable look, apply multiple thin layers instead of a single thick coat. Each layer should dry completely before adding the next. This approach not only enhances smoothness but also allows for better control over the final appearance.
Finish with a Sanding: After applying the final coat, lightly sand the surface with ultra-fine sandpaper once it is fully dry. This step helps to smooth any imperfections and prepares the surface for a final polish or clear coat, elevating the overall effect.
Consider the Environment: Temperature and humidity can impact the application process and drying time. Aim to work in an environment with controlled conditions to ensure optimal results, as excessive moisture or dry air can compromise the finish quality.
By implementing these techniques, you will be well on your way to achieving a beautifully smooth surface that stands out in any space.
Maintaining and Protecting Stained Surfaces
Ensuring the longevity of beautifully finished wood surfaces requires thoughtful actions to preserve their appearance and structure. A few simple practices can dramatically improve their resilience against wear, scratches, and environmental factors.
-
Regular Cleaning: Utilize a soft cloth dampened with a mild cleaner to remove dust and dirt from the surface. Avoid harsh chemicals that can strip away the protective finish.
-
Avoid Excessive Moisture: Excess water can seep into the wood, leading to swelling and warping. Always wipe up spills promptly.
-
Use Coasters and Mats: Protect the surface from heat, moisture, and scratches by employing coasters under beverages and mats under hot items.
In addition to these protective measures, periodic maintenance is essential to keep the finish intact.
-
Touch-Up Finishes: Inspect surfaces regularly and apply touch-up finishes as necessary to cover minor scratches and dings.
-
Reapply Protective Coatings: Depending on usage, consider reapplying protective sealants or finishes every few years to maintain the integrity of the surface.
By adopting these practices, you can significantly enhance the durability and beauty of your wooden surfaces, ensuring they remain a focal point in your space for years to come.
Q&A: Home furniture staining interior doors
What are the best types of stains to use for interior doors?
When choosing stains for interior doors, it’s crucial to consider the wood type and the desired finish. Oil-based stains are popular due to their rich color and deep penetration, while water-based stains offer quick drying times and low odor. Gel stains are also an excellent option as they provide even coverage on vertical surfaces. For a stunning finish, consider test samples first to see how the stain interacts with the wood grain.
How can I prepare my interior doors for staining effectively?
Preparation is key to achieving a beautiful stained finish. Start by removing any hardware, such as handles and hinges. Clean the door thoroughly to eliminate dust and grease. If the door has an existing finish, strip it using a chemical stripper or sanding. Sand the surface with fine-grit sandpaper to create a smooth texture for the stain to adhere to. Finally, wipe the door with a damp cloth and let it dry completely before applying stain.
How do I achieve an even stain application on my interior doors?
To achieve an even stain application, apply the stain using a high-quality brush or cloth. Work in small sections, applying the stain in the direction of the wood grain. After applying the stain, wait a few minutes to allow it to penetrate the wood. Then, use a clean cloth to wipe away any excess stain to avoid uneven patches. Be consistent with your application technique and work methodically across the door for a uniform finish.
Can I combine different stain colors for a unique look on my interior doors?
Yes, combining different stain colors can create a unique and personalized look for your interior doors. This technique, known as layering, can enhance the depth of the finish. To do this, start with a base color stain and allow it to dry completely. Then, apply a second stain in a complementary color, blending it well to achieve your desired effect. It’s best to test this technique on a scrap piece of wood or the back of the door first to ensure you like the result.
What should I do after staining to protect my interior doors?
After staining your interior doors, it’s essential to protect the finish to ensure it lasts. Applying a clear topcoat, such as polyurethane or a water-based sealant, creates a barrier against moisture and spills. Choose a finish that matches your desired look—matte, satin, or glossy. Before applying the topcoat, let the stain cure for at least 24 hours. Follow the application instructions for the topcoat, applying it with a clean brush or roller, and allow it to dry thoroughly between coats for the best results.
What are the best types of stains to use for interior doors to achieve a stunning finish?
When selecting stains for interior doors, consider those that are specifically formulated for wood, such as oil-based or water-based stains. Oil-based stains tend to penetrate deeper, providing richer color and durability, while water-based stains are easier to clean up and dry faster. Popular options include gel stains, which offer a thicker consistency for even application, and traditional stains in varying shades. Ultimately, the choice of stain will depend on the type of wood your door is made from, your desired finish, and your personal preferences for maintenance and cleanup.
How do you prepare a wood door for staining?
Before staining a wood door, it’s important to apply a pre-stain wood conditioner. This step helps ensure the wood absorbs the stain evenly, especially on interior wood doors. Sanding the surface of the door will smooth out imperfections and bring out the natural grain of the wood. Make sure the door is clean and free of dust before applying any stain.
What’s the best way to stain a wood door evenly?
To stain a wood door evenly, apply a coat of stain in the direction of the grain of the wood using a brush or staining pad. Be sure to stain onto the wood carefully, avoiding any drips. Wipe off excess stain to prevent blotches, and let the stain dry completely before adding a second coat, if needed. This process will help maintain the natural beauty of the wood.
Can you stain an exterior wood door the same way as an interior wood door?
While the staining process is similar for both interior and exterior wood doors, exterior doors may require a more durable finish to protect against the elements. After applying the wood stain and letting it dry, it’s recommended to use a varnish or topcoat for exterior wood to shield it from weather damage. Staining an exterior wood door may also require extra attention to ensure even coverage and a protective seal.
How do you prevent stain drips when staining a wooden door?
To avoid stain drips, apply a thin coat of stain onto the wood, and immediately wipe off any excess stain. It’s important to stain your wood door while it’s laying flat, if possible, to prevent drips. If staining a door vertically, work in small sections and check for drips frequently, wiping them off as you go to keep the door clean and even.
How long should you let a stained wood door dry before applying a topcoat?
After staining a wood door, allow the first coat of stain to completely dry before applying a topcoat. For most wood stains, this can take 24 to 48 hours. Once the stain has dried, you can apply a protective finish, such as varnish, to enhance the texture of the wood and protect the door from wear. This is especially important for exterior doors.